3D printing lets you turn digital designs into real objects by building them layer by layer. Many people find 3d printing for newbies exciting because you can create anything from tools to art at home. As a beginner, you may worry about cost, safety, or the learning curve. Common issues include warping, layer shifting, and stringing, as shown below:
|
Concern |
Description |
|---|---|
|
Warping |
The corners of the object lift off the bed during printing. Solutions include using a heated bed or adhesives like glue stick. |
|
Layer Shifting |
This occurs when layers are misaligned. It can be resolved by checking for loose belts or overheating issues. |
|
Stringing |
Fine threads of plastic may appear between parts of your model. Solutions include checking the dryness of your filament and adjusting retraction settings in your slicer. |
You might also find CAD software tricky, but a simple tool like Tinkercad helps. This guide will support you every step of the way.
Key Takeaways
- 3D printing allows you to create objects from digital designs, making it accessible for personal projects and prototyping.
- Understanding key terms like FDM, PLA, and layer shifting helps you avoid common mistakes and improve print quality.
- Choosing the right printer depends on your needs, budget, and intended applications; FDM printers are great for beginners.
- Selecting the appropriate filament is crucial; start with PLA for ease of use and environmental friendliness.
- Regular maintenance and proper setup of your printer lead to better results and a smoother printing experience.
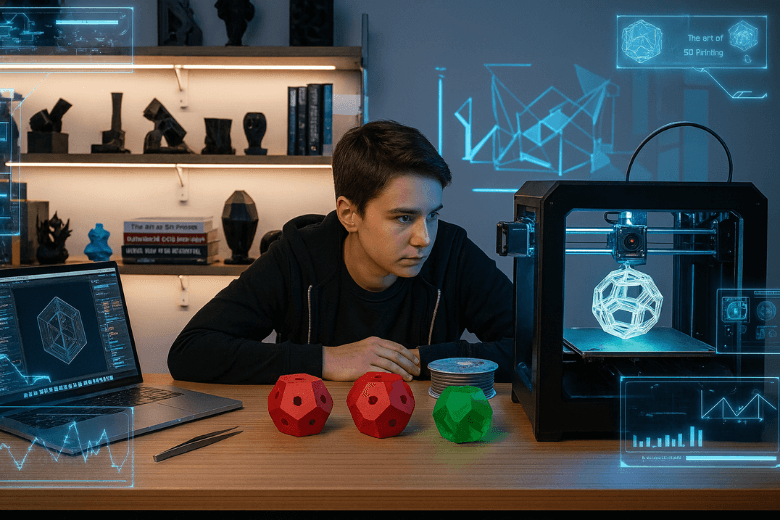
3D Printing Basics for Beginners
What Is 3D Printing?
You encounter 3d printing technology in many industries, from engineering to medicine. This process transforms digital designs into physical objects by adding material layer upon layer. You start with a computer-aided design (CAD) file, which acts as the blueprint for your creation. The printer reads this file and builds your object from the bottom up, using materials such as plastic filament or resin.
You do not need advanced technical skills to begin. Many modern machines offer user-friendly interfaces and straightforward setup procedures. As you explore the beginner's guide to 3d printing, you discover that the technology enables you to produce prototypes, replacement parts, and creative projects with ease. You gain control over the design and manufacturing process, which empowers you to innovate at home or in the classroom.
Tip: You should always check your printer’s manual before starting your first project. This helps you avoid common mistakes and ensures a smoother experience.
Key Terms Explained
Understanding essential terminology forms the foundation of your success with 3d printing. You encounter many new words as you progress, and knowing their meanings helps you avoid confusion and costly errors. The following table introduces the most important terms you will see in any beginner's guide:
|
Term |
Definition |
|---|---|
|
Additive Manufacturing |
The method of creating a part by building material layer by layer from a CAD model. |
|
Fused Deposition Modeling (FDM) |
The most common type of 3D Printing where objects are produced by laying plastics layer by layer. |
|
Stereolithography (SLA) |
A type of 3D Printing which uses UV screens to cure plastic resin onto a bed. |
|
Selective Laser Sintering (SLS) |
A type of 3D printing that uses concentrated lasers to bind together patterns in material powder. |
|
Filament |
Plastics made of polymer resins that become soft above a certain temperature and harden when cooled. |
|
Direct Drive |
A type of FDM extruder where the extruder motor is placed on the carriage with the hotend assembly. |
|
Bowden |
A type of FDM extruder where the extruder is placed separately from the carriage. |
You improve your print quality and reduce frustration when you understand these terms. Many experienced engineers who move from CNC machining or injection moulding often overlook the unique limitations of FDM printers. You should specify functional tolerances only where necessary and leave generous clearance elsewhere. This approach increases your print success rate and minimises wasted material.
- You avoid common design errors by learning the differences between FDM, SLA, and SLS.
- You achieve better results when you select the correct filament for your project.
- You save time and money by understanding how direct drive and Bowden extruders affect print speed and quality.
You build confidence as you master 3d printing fundamentals. This guide helps you navigate the terminology and processes, making your journey smoother and more enjoyable. You find that 3d printing basics are not as intimidating as they seem, especially when you have clear explanations and practical advice.
Types of 3D Printers: A Beginner’s Guide
Main Printer Types
You encounter several main 3d printer models when you start exploring 3d printing. Each model uses a different method to create objects, and each has unique strengths and weaknesses. The table below outlines the most common types you will find as a beginner:
|
Type |
How It Works |
Materials Used |
Applications |
Pros |
Cons |
|---|---|---|---|---|---|
|
Fused Deposition Modeling |
Melts plastic filament and layers it to build |
PLA, ABS |
Prototyping, hobby projects |
Affordable, easy to use |
Lower precision and finish |
|
Stereolithography |
Uses a laser to cure liquid resin into layers |
Photopolymer resins |
Dentistry, jewellery, detailed models |
High precision, smooth finishes |
More expensive, requires post-processing |
|
Selective Laser Sintering |
Uses a laser to fuse powdered material |
Plastics, ceramics, metals |
Industrial manufacturing, prototypes |
Strong, durable parts |
High cost, industrial-grade equipment required |
|
Digital Light Processing |
Uses a digital projector to cure resin |
Liquid resins |
Dental models, intricate designs |
Faster than SLA, similar precision |
Resins can be pricey |
|
Material Jetting |
Sprays material layer by layer |
Photopolymers, waxes |
Prototypes, medical models |
Extremely precise, multi-material |
Expensive, not widely available |
You see that Fused Deposition Modeling (FDM) is the most popular choice for home use. This model offers a balance of affordability and ease of use. Stereolithography (SLA) and Digital Light Processing (DLP) provide higher detail, which suits jewellery or dental applications. Selective Laser Sintering (SLS) and Material Jetting are more advanced and often used in industry.
Note: You should always match your choice of 3d printer models to your intended application and budget.
Choosing the Right Printer
You face many options when you decide how to choose a 3d printer. The right choice depends on your needs and resources. Consider these factors before you buy your first beginner 3d printer:
- Define the purpose of your 3d printing projects. Personal use, education, or professional work each require different features.
- Set a clear budget. Many reliable 3d printer models are available at entry-level prices.
- Look for ease of use and reliability. User-friendly interfaces and good customer support help you get started quickly.
- Check for features that match your application. High resolution suits jewellery, while material compatibility matters for engineering.
You gain confidence when you select a printer that fits your goals. This guide helps you understand the main differences between 3d printer models and gives you a clear path to start with 3d printing technology.
Essential Equipment and Materials
Filaments and Materials
You need to select the right 3d printing materials before you start any project. The choice of materials affects the strength, appearance, and function of your printed objects. Most entry-level 3d printing processes use thermoplastic filaments. These filaments melt and solidify during printing, allowing you to create a wide range of items.
The table below introduces the most popular filaments for beginners:
|
Filament |
Description |
Properties |
|---|---|---|
|
PLA |
Polylactic Acid made from biological materials like sugarcane or cornstarch. |
Robust, non-combustible, but not heat resistant (deforms above 90°C). |
|
ABS |
Acrylonitrile butadiene styrene, a strong plastic combining rubber and plastic properties. |
Impact resistant and dimensionally stable. |
|
PETG |
A filament known for its strength and ease of use. |
Strong and user-friendly for beginners. |
You often start with PLA because it is easy to print and environmentally friendly. ABS offers more durability, which suits mechanical parts. PETG provides a balance between strength and ease of use. You should store all 3d printing materials in a dry place to prevent moisture absorption, which can affect print quality.
Tip: Always check the compatibility of your printer with different 3d printing materials before purchasing new filaments.
Basic Tools for Beginners
You require several basic tools to support your 3d printing processes. These tools help you prepare, maintain, and finish your prints. A well-equipped workspace ensures smoother operation and better results.
- Spatula or scraper: You use this to remove prints from the build plate without damaging the surface.
- Tweezers: These help you clear away stray filament or clean the nozzle.
- Digital callipers: You measure your prints accurately to check dimensions.
- Side cutters: You trim excess filament and remove supports from finished prints.
- Glue stick or adhesive: You apply this to the build plate to improve print adhesion and reduce warping.
- Brush or compressed air: You use these to keep your printer free from dust and debris.
You should keep these tools close at hand. Regular maintenance and careful handling of your equipment extend the life of your 3d printing technology. This guide recommends starting with these essentials to build confidence and achieve consistent results.
Creating and Finding 3D Models
Downloading Models
You can access a wide range of 3D models online, which makes starting with 3d printing much easier. Many websites offer both free and paid options, so you can find something suitable for your project and budget. The table below lists some of the most popular platforms where you can download models for 3d printing:
|
Site |
Type |
Free/Paid |
|---|---|---|
|
Thingiverse |
Repository |
Free |
|
Cults |
Marketplace |
Free, Paid |
|
Printables |
Repository |
Free |
|
MyMiniFactory |
Marketplace |
Free, Paid |
|
Pinshape |
Marketplace |
Free, Paid |
|
CGTrader |
Marketplace |
Free, Paid |
|
TurboSquid |
Marketplace |
Free, Paid |
|
Yeggi |
Search Engine |
Free, Paid |
|
STLFinder |
Search Engine |
Free, Paid |
You find that CGTrader and TurboSquid provide extensive catalogueues of high-quality models. Many professionals use these sites for game development and advertising, but you can also benefit from their large selection as a beginner. You may also explore repositories like Thingiverse and Printables, which focus on community-driven sharing and support a wide range of 3d printing processes.
Tip: Always check the file format before downloading. Most 3d printing technology uses STL or OBJ files.
Designing Your Own
You may wish to create your own models as you become more confident with 3d printing. Several beginner-friendly software options help you design objects without advanced skills. The table below highlights some of the best choices for new users:
|
Software |
Description |
Features |
|---|---|---|
|
TinkerCAD |
Online tool for beginners with a block-building concept |
Free, easy to use, community gallery |
|
Sculptris |
Intuitive sculpting software |
Saves in OBJ format, user-friendly interface |
|
Sketchup Make |
Simple tool for architectural and general design |
Free version, templates, cloud storage |
|
SelfCAD |
Online CAD for students and beginners |
Intuitive tools, cloud-based, advanced features |
|
3D Slash |
Block-based modelling for new users |
VR view, team function for education |
You can start with TinkerCAD if you want a straightforward introduction to 3d printing processes. This platform uses a block-building approach, which helps you understand the basics quickly. Sculptris and 3D Slash offer creative tools for sculpting and modelling, while Sketchup Make and SelfCAD provide more advanced features as you progress.
You build your skills by experimenting with different software and exploring online resources. This approach ensures you gain practical experience and confidence in designing for 3d printing.
Setting Up Your 3D Printer
Setting up your first 3d printer marks a significant step in your journey with 3d printing. You must approach this process methodically to ensure reliable results and minimise frustration. This section guides you through unboxing, assembly, software installation, and your first print, helping you avoid common pitfalls and achieve success from the outset.
Unboxing and Assembly
You should begin by carefully unboxing your 3d printer. Check that all components are present and undamaged. Most entry-level printers arrive partially assembled, but you will need to complete several key steps:
- Assemble the Main Frame: Secure the Z-axis components, connect the hotend, and attach the build plate. Follow the manufacturer’s instructions closely, as each model may have unique features.
- Install the Power Supply: Mount the power supply unit and connect the necessary wires. Ensure all connections are firm and safe before proceeding.
- Install the Filament Holder: Attach the filament holder to the frame. This part supports the filament spool during the 3d printing process.
- Level the Build Plate: Perform initial bed levelling using the adjustment knobs or automatic levelling system. Accurate levelling is essential for good adhesion and print quality.
- Load Filament and Start Printing: Insert the filament into the extruder and feed it through to the hotend. You can now prepare for your first test print.
Tip: Take photographs during assembly. These images help you remember cable routing and component placement for future maintenance.
Many beginners make mistakes during setup. You should avoid thin walls, as they can warp or break. Maintain a minimum wall thickness of 1.2 mm for FDM printers. Do not overuse overhangs; angles above 45° require support structures, which affect surface quality. Consider the orientation of your models, as layer direction influences strength. Always leave at least 0.2 mm clearance for parts that must fit together. Simplify your designs to reduce print time and avoid unnecessary detail unless you use resin-based 3d printing technology.
Installing Software
You must install suitable 3d printing software to prepare your models for printing. Slicers convert your digital models into instructions that your printer understands. The table below outlines the most popular options for beginners:
|
Software |
Description |
|---|---|
|
PrusaSlicer |
One of the most commonly used slicers in the 3d printing industry. |
|
Cura |
A benchmark slicer for Ultimaker 3d printers, also compatible with most other printers. |
|
ChiTuBox Basic |
Used for slicing 3d models for LCD stereolithography or MSLA printing. |
You can also use TinkerCAD to create or modify models before slicing. This free online tool allows you to import images and adjust them for 3d printing. After installing your chosen slicer, import your model, select the correct printer profile, and configure basic settings such as layer height, infill, and support structures.
Note: Always update your printer’s firmware and software to the latest version. This ensures compatibility and access to new features.
First Print Steps
You are now ready to begin your first print. Start with a simple calibration model, such as a cube or test pattern, to verify your setup. Follow these steps for a successful print:
- Preheat the printer to the recommended temperature for your filament.
- Load the filament and ensure it extrudes smoothly from the nozzle.
- Select your model in the slicer and export the G-code file to an SD card or send it directly to the printer.
- Start the print and observe the first few layers. Good adhesion and even extrusion indicate correct setup.
You may encounter common issues during your first print. The table below summarises frequent problems and their solutions:
|
Issue |
Description |
Resolution |
|---|---|---|
|
Over or Under Extrusion |
The printer does not produce the required amount of plastic. |
Adjust the extrusion multiplier to ensure the correct amount of plastic is extruded. |
|
Layer Splitting |
Separation of layers during printing. |
Adjust the nozzle height and reduce the height of the structure while increasing heat. |
|
Stringing |
Appearance of threads or hairs during printing. |
Configure the nozzle’s retraction speed and distance correctly. |
|
Surface Imperfections |
Visible flaws on the final product. |
Adjust coasting and retraction settings to eliminate imperfections. |
Tip: If you see gaps or excess material, modify the extrusion multiplier. For layer separation, check the nozzle height and increase the print temperature slightly. Adjust retraction settings to eliminate stringing and improve surface finish.
You will improve with practice. Each print teaches you more about the 3d printing process and how to optimise your models for better results. Keep notes on what works and what does not. This habit accelerates your learning and helps you master 3d printing technology.
Practical Applications for Beginners
Everyday Uses
You can unlock a wide range of practical benefits with 3d printing at home. Many users start with simple projects that improve daily life and build confidence. Here are some common ways you can apply 3d printing technology:
- Home Decor and Custom Furniture: You design and print unique vases, lampshades, or wall art to personalise your living space.
- Practical Household Items: You create kitchen gadgets, cable organisers, or storage boxes tailored to your needs.
- DIY Projects for Hobbyists: You build custom parts for RC drones, model trains, or board games, adding a personal touch to your hobbies.
- Personalised Gifts: You craft jewellery, keyrings, or figurines that carry special meaning for friends and family.
- Replacement Parts and Repairs: You print spare parts for broken appliances or furniture, which saves money and reduces waste.
Tip: You should always measure the original part carefully before designing a replacement. This ensures a proper fit and reliable performance.
Creative Projects
You can explore your creativity with 3d printing applications that go beyond practical tasks. Many beginners enjoy experimenting with artistic designs, educational models, or prototypes for inventions. You might sculpt miniature landscapes, design custom phone cases, or produce educational aids for science lessons. Some users collaborate with others online, sharing designs and learning new techniques. You gain valuable skills in design, problem-solving, and digital fabrication as you complete each project.
Note: You do not need advanced skills to start. Many free resources and communities support your journey from simple prints to complex creations.
Costs and Budgeting Guide
Initial Costs
You must consider the initial investment before starting your journey with 3d printing. The price of entry-level equipment and essential accessories varies widely. You can find affordable options, but you should always plan for the full setup. Here is a breakdown of what you might expect:
- The average cost of a basic plastic 3d printer ranges from £500 to £2,000.
- Some high-end models can exceed £10,000, but these are not necessary for beginners.
- Many FDM printers, which suit new users, start at under £200.
- You will also need to purchase 3d printing materials such as PLA or ABS filament, which usually cost between £20 and £40 per spool.
- Additional accessories, including tools for maintenance and safety gear, may add £50 to £100 to your initial outlay.
You should always budget for both the printer and the first set of materials. This approach ensures you can begin printing immediately without unexpected delays.
Tip: Start with a reliable FDM printer and a small selection of 3d printing materials. This strategy allows you to learn the basics without overspending.
Ongoing Expenses
You will encounter regular costs as you continue to use your 3d printer. These expenses cover everything from machine upkeep to the purchase of new materials. The table below outlines the main categories you should include in your budget:
|
Expense Type |
Description |
Estimated Cost |
|---|---|---|
|
Machine Maintenance |
Regular upkeep to ensure printer functionality. |
$0.81 per day |
|
Utilities |
Costs associated with electricity and other utilities used during printing. |
Variable |
|
Materials |
Filament and other materials required for printing. |
Depends on usage |
|
Software |
Licensing or subscription fees for 3d printing software. |
Variable |
|
Manpower |
Labour costs for preparing and managing print jobs. |
$0.8 to $6.0 per hour |
You will spend most of your ongoing budget on materials. Filament remains the primary consumable, but you may also need adhesives, cleaning supplies, and replacement parts. The cost of 3d printing materials depends on the type and quantity you use. You should monitor your usage to avoid unnecessary waste and keep your projects affordable.
Note: Efficient use of materials and regular maintenance help you control costs and extend the life of your equipment.
Learning Curve and Support
How Easy Is 3D Printing?
You may find the learning curve for 3d printing steeper than expected. Many users report that the technology feels complex at first. You face challenges such as understanding machine setup, troubleshooting errors, and learning design software. Surveys show that beginners often struggle with a lack of knowledge and practical skills. Training and assessing the viability of the 3d printing process can take time, especially for small businesses or home users.
You do not need to feel discouraged. Most people can learn the basics quickly with the right approach. For example, a typical beginner workshop lasts around six hours, which gives you enough time to cover essential skills.
|
Workshop Type |
Duration |
|---|---|
|
3D Printer Craft Workshop - Beginner |
6 hours |
You build confidence as you complete simple projects and gain hands-on experience. Each print teaches you something new, and you improve with practice.
Note: You should expect some trial and error. Every mistake helps you understand your printer and materials better.
Resources for Beginners
You have access to a wide range of resources that make learning easier. User-friendly software such as TinkerCAD and Blender helps you design models without advanced skills. Online repositories like Thingiverse and MyMiniFactory offer thousands of ready-to-print designs. If you want to advance, you can explore Autodesk Fusion 360 or SolidWorks for more complex projects.
You can also join supportive communities for advice and troubleshooting:
- Reddit: Exchange tips and solve problems with other users.
- Facebook Groups: Find beginner-friendly groups such as 3D Printing Beginners.
- Discord Servers: Get real-time help and guidance.
- Manufacturer Support Forums: Access setup guides and product support from brands like Prusa and Creality.
You may consider formal training. Accredited programmemes such as 3D Print Academy and advanced courses at the MIT Center for Additive and Digital Advanced Production Technologies provide structured learning. Vision Miner also offers practical training for new users.
Experts agree that you can start with little knowledge and become proficient through dedicated practice. Learning from experienced users shortens the journey and helps you avoid common pitfalls.
Safety Tips for New Users
Equipment Safety
You must treat 3d printing equipment with respect to prevent accidents and ensure reliable operation. Always wear safety glasses and gloves when handling resin or operating your printer. You should handle resin with care, using gloves and goggles, and dispose of it according to local hazardous waste guidelines. Keep the printer’s lid closed during operation to avoid UV exposure. Never leave your printer running unattended, and always keep a fire extinguisher nearby.
You should regularly inspect wiring and ensure the power supply remains stable. Machines must be off and isolated during cleaning or maintenance. Secure your printer in place and use proper lifting equipment if you need to move it. The table below summarises essential safety guidelines:
|
Safety Guideline |
Description |
|---|---|
|
Purchase suitable equipment |
Choose UKCA/CE marked printers with emergency shut off and enclosures. |
|
Use appropriate filters |
Change filters as recommended to maintain air quality. |
|
Maintain ventilation |
Keep rooms well-ventilated to reduce fumes and heat. |
|
Select suitable filament |
Prefer PLA to minimise harmful emissions; store filament properly. |
|
Monitor nozzle temperature |
Use the lowest recommended temperature to reduce emissions. |
|
Follow operational procedures |
Limit time near operating printers and allow proper clearance after printing. |
|
Ensure electrical safety |
Check connections and use surge protectors. |
|
Implement cleaning protocols |
Turn off and isolate machines before maintenance. |
|
Use manual handling aids |
Secure printers and use lifting equipment when moving. |
Tip: You should always follow the manufacturer’s operational procedures and safety recommendations.
Workspace Safety
You need to create a safe environment for 3d printing at home. Place your printer in a well-ventilated area, away from spaces where people spend long periods, such as bedrooms or offices. Choose a printer with a closed chamber and integrated HEPA air purifier to minimise exposure to harmful substances. Maintain good room ventilation at all times.
Wear a protective mask (FFP2 or FFP3) if you spend time near a working printer. Avoid touching the nozzle, print bed, or printer during and shortly after operation to prevent burns. Tie back long hair and avoid loose clothing to reduce the risk of accidents. You should never leave your printer running without supervision.
You can find further safety information and support through online resources and manufacturer support forums. These resources help you stay informed and confident as you develop your 3d printing skills.
You gain many advantages when you start your journey with 3d printing:
- Rapid prototyping lets you turn ideas into models quickly.
- You reduce waste and save costs by printing only what you need.
- Complex designs become possible, even those traditional methods cannot achieve.
- Print on demand means you avoid large inventories.
Remember, learning takes time. Stay motivated by joining training sessions or reading support articles. If you face challenges, open a support ticket for expert help. Each step brings you closer to mastering this exciting technology.
FAQ
What is the best way to start with 3D printing as a beginner?
You should begin with an entry-level printer and simple projects. Choose PLA filament for easy handling. Read your printer’s manual and join online communities for support. Practice with basic models to build your confidence and skills.
How long does a typical 3D print take?
Print time depends on the object’s size and complexity. Small items may finish in under an hour. Larger or detailed prints can require several hours. You should always check estimated times in your slicer software before starting.
Can you leave a 3D printer running overnight?
You should avoid leaving your printer unattended. Unexpected errors or overheating can cause safety risks. Always monitor your machine during operation. If you must step away, pause the print or use remote monitoring tools.
What materials are safe for home use?
PLA is the safest and most popular material for home use. It produces minimal fumes and is biodegradable. You should ensure good ventilation when using other materials, such as ABS or resin, to reduce exposure to harmful emissions.
Is 3D printing expensive to maintain?
You can keep costs manageable with regular maintenance and efficient material use. Most expenses come from filament and occasional replacement parts. Careful planning and proper storage of supplies help you avoid unnecessary spending on 3d printing.
Share:
What is 3D Printing and How Does a 3D Printer Work
Essential Tips for Keeping Your 3D Printer in Top Condition