Layer shifting shows up as sudden horizontal steps in your walls. The most common culprit on hobby FDM machines? Over‑aggressive speed, acceleration, or jerk (instantaneous speed change) that makes steppers miss steps during sharp direction changes. The good news: you can usually stabilise things in minutes with safer motion limits and a couple of quick mechanical checks.
Key takeaways
-
Start with motion: lowering speed, acceleration and jerk is the fastest way to stabilise XY and fix a layer shift.
-
Align slicer and firmware: slicer values should sit at or below firmware caps for predictable motion.
-
Verify with a small test: a 20 mm cube quickly confirms whether your tweak worked before you risk a long print.
-
If shifting persists, check belts and pulleys, and make sure stepper motors aren’t overheating.
Quick reference: safe starting points for motion
These are conservative values many hobby printers can handle. Treat them as a starting point and validate with a small test print.
-
Print speed: 40–60 mm/s
-
XY acceleration: 500–1000 mm/s² (go lower if your printer is heavy)
-
Jerk / instantaneous speed change (Marlin X/Y): 5–8 mm/s
Why this helps: Excessive motion spikes can exceed motor torque during rapid direction changes, causing missed steps and visible offsets. Vendor sources describe this mechanism and recommend lowering motion aggressiveness while checking mechanics, as summarised by the Bambu Lab knowledge base in its overview of layer shifts and by Creality’s guidance on speed/acceleration/jerk effects (Bambu Lab Wiki — Layer Shifts; Creality article on layer shift causes and fixes).
The 10‑minute 3D printer layer shift fix checklist (from easy to harder)
-
Observe the pattern (1 minute) Look for a sideways “step” at corners or at consistent heights—often right after fast infill or travel moves. That’s a hallmark of motion‑induced shifting (described in the Bambu Lab knowledge base linked above).
-
Tame the motion in your slicer (2 minutes)
-
Cura: Preferences > Configure Cura > Settings > enable Acceleration and Jerk; then in the Print settings panel, reduce Print Speed to 40–60 mm/s, set Acceleration for Walls/Travel to 500–1000 mm/s², and Jerk for X/Y to ~5–8 mm/s. Ultimaker’s support docs explain where to reveal these controls within Custom settings (Ultimaker Support: infill/speed context).
-
PrusaSlicer: Print Settings > Speed; set perimeters/infill ~40–60 mm/s. Enable Acceleration control (Expert mode) and set X/Y around 500–1000 mm/s². The Prusa Knowledge Base covers these menus (Prusa KB: Speed settings). Re‑slice and prepare a small test model.
-
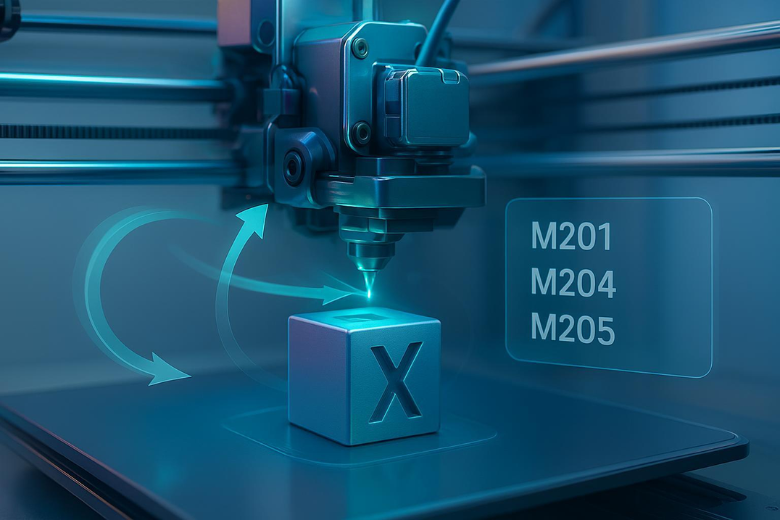
Optional: temporary firmware caps (1 minute) If you’re comfortable with G‑code and Marlin firmware, send these temporary limits via USB/terminal (don’t save yet):
-
M201 X1000 Y1000; Max XY acceleration caps -
M204 S800 T800; Default accel (start/print) -
M205 X8 Y8; Classic jerk / instantaneous change
You can list current settings with M503. Save later with M500 only after a successful test. Marlin’s documentation explains EEPROM saving and motion settings (Marlin EEPROM feature; Marlin motion settings).
-
Quick belt and pulley check (2 minutes)
-
Belts should deflect roughly 2–3 mm at the mid‑span with moderate finger pressure—too loose can slip, too tight adds drag. This rule‑of‑thumb appears in vendor maintenance guidance such as Anycubic’s care article (Anycubic maintenance guide).
-
Verify the small grub/set screws on the X/Y pulleys clamp onto the motor shaft flat. Some manuals (e.g., Elegoo Neptune series) highlight re‑tensioning belts via the tensioners and ensuring pulleys are tight (see the Neptune 4 Max manual PDF link on Elegoo’s site).
-
Stepper heat sanity check (1 minute) Run a short movement test. Motors should be warm but not painfully hot. If the cases feel extremely hot or you suspect 60–70+ °C, pause to cool and review driver current or airflow. When in doubt, lower motion demands first rather than raising driver current.
-
Test with a 20 mm cube (3–4 minutes to prep; print time varies) Slice a simple 20 mm cube at the motion values above. Pass: straight walls, no horizontal offsets; dimensions within ~0.1–0.2 mm. Fail: visible lateral steps—reduce acceleration/jerk further (e.g., accel 400–600 mm/s²; jerk 4–6 mm/s) and re‑check belts and pulley screws. For a broader overview of calibration cube diagnostics, see All3DP’s guide (XYZ calibration cube troubleshooting).
-
Persist what worked (30 seconds) If your test cube is clean, persist firmware caps with
M500and save your slicer profile for everyday printing. Keep slicer requests at or below firmware caps so the printer behaves predictably (a point also reflected in Cura/PrusaSlicer documentation about firmware clamping of speeds and accelerations).
Why reducing motion solves most layer shifts
Over‑aggressive speed/acceleration/jerk spikes the instantaneous load on belts, bearings and motors. If torque is insufficient at that instant, the motor doesn’t reach its commanded position, and the next layer is offset. Multiple vendors echo this, advising to reduce motion aggressiveness first and then confirm mechanics are free and unobstructed. See the concise explanation and recommendations in the Bambu Lab knowledge base and Creality’s article linked earlier, and practitioner cases collected on the Simplify3D forum that tie repeatable shifts to high travel acceleration (Simplify3D forum case: acceleration too high).
Preventative habits
-
Use moderate motion for everyday prints; increase only once a test cube stays clean at the higher values.
-
Re‑check belt tension and pulley screws monthly; avoid overtightening which can increase friction.
-
Keep rails/rods clean and lubricated according to your printer vendor’s guidance.
-
In warm rooms or enclosed printers, periodically check motor temperatures during long jobs and improve cooling if they run very hot.
FAQ
Q: My print shifts only on tall parts. Is that still motion related? A: Often, yes—higher parts mean more inertia at the toolhead. Start by reducing acceleration/jerk and re‑checking belts. Also look for cable snags or cooling ducts hitting the model.
Q: Should I increase stepper driver current to stop skips? A: Only with board‑specific guidance. Try gentler motion first. Excessive current can overheat motors and drivers.
Q: Do I need input shaping or advanced firmware to fix this? A: Not for most cases. Conservative speed/accel/jerk plus sound belts and pulleys usually solves it. Advanced features can be explored later if you need higher speeds.
Sources and further reading
-
The Bambu Lab knowledge base summarises how motion aggressiveness and resistance cause deviations and offers checks for mechanics: Layer Shifts (Bambu Lab Wiki).
-
Creality’s guide discusses speed/acceleration/jerk effects on layer shifts and suggests lowering them during troubleshooting: Why Your 3D Prints Are Layers Shifting? (Creality, 2025).
-
Marlin explains saving and reviewing motion settings and EEPROM: EEPROM feature and Motion settings.
-
All3DP’s calibration cube guide helps you spot misalignment artefacts: XYZ calibration cube troubleshooting.
Next steps
If you want a dependable, open‑source‑friendly printer to apply these settings on, consider reputable models that expose motion controls clearly and ship with accessible spares. Disclosure: Sovol is our product; its open approach and UK‑based fulfilment can help beginners and educators iterate quickly, but the steps above apply to most FDM printers.
Share:
7 Beginner‑Friendly Ways to Smooth PLA 3D Prints (Plus a 30‑Minute Quick Start)
Sovol SV08 Max Review: Is This 500×500×500mm CoreXY 3D Printer Worth It?