If you run a shared printer (makerspace, school lab, club workshop), you’ve probably seen this pattern: a spool that printed fine last month suddenly starts stringing, the surface goes rough, and parts snap too easily.
Often, nothing “mystical” happened to your slicer profile.
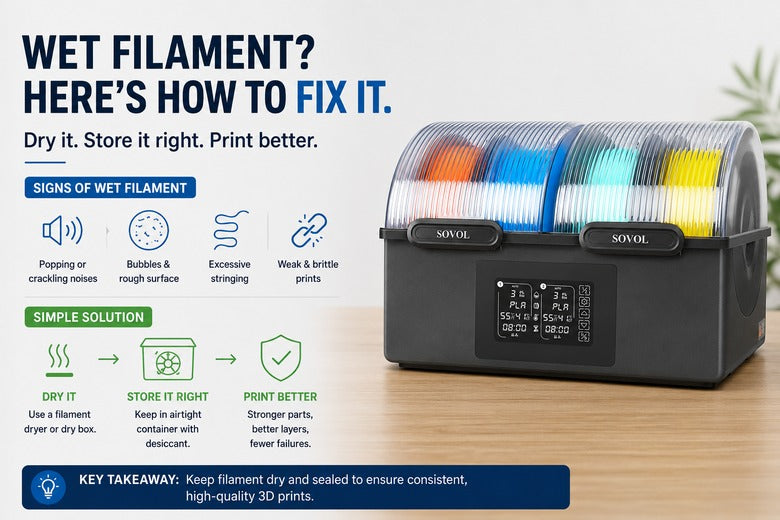
What changed is the spool. Many materials absorb moisture from the air over time. When that water hits a hotend, it flashes into steam and destabilises extrusion.
Key Takeaway: Wet filament isn’t just a cosmetic problem. It changes extrusion consistency and can weaken parts — which is exactly what you don’t want in a community setting where uptime and repeatability matter.
A 60-second wet filament check (before you touch your slicer)
Use this quick checklist when prints suddenly go off the rails:
-
Listen at the nozzle: crackling, popping, or hissing is a strong moisture signal (if you’re Googling popping sounds 3D printer, check moisture early).
-
Watch the extruded line (during a purge or skirt): does it look “foamy” or bubbly?
-
Inspect the surface: random tiny pits/craters and a rough, sandy finish are common wet-filament tells.
-
Look for new stringing from wet filament: if retraction used to be fine and now it’s suddenly messy, moisture is a prime suspect.
-
Do the bend test (especially PLA): if it snaps unusually easily instead of bending a bit, moisture and/or aging may be in play.
Wet filament vs. “just tuning”: a fast symptom table
|
What you’re seeing |
Wet filament is likely when… |
It might be something else when… |
|---|---|---|
|
Stringing / oozing |
It appears suddenly on a spool that used to behave |
It’s always been there and improves predictably with retraction/temp tweaks |
|
Rough, pitted surfaces |
The pits look random, like tiny bubbles popped |
You see consistent ripples/banding tied to speed or mechanics |
|
Weak layer bonding / brittle parts |
Failures feel “hollow” or inconsistent |
You changed cooling, temps, or print speed recently |
|
Nozzle noise |
You hear popping/hissing while printing |
It’s quiet — and defects correlate with a specific corner/axis (mechanical) |
If at least two signals show up together, it’s worth drying the spool before you burn time chasing settings.
What moisture does inside your hotend
Filament doesn’t absorb water like a sponge — it absorbs it into the polymer over time. When you heat that material, the trapped moisture turns into steam. That rapid expansion creates bubbles and pressure fluctuations in the melt, which shows up as inconsistent extrusion and surface defects.
Sovol’s own overview of the issue in “How to Identify Wet Filament Problems in 3D Printing” (Sovol3D, 2025) describes the classic symptoms (popping, bubbles, rough surfaces) and ties them directly to water flashing into vapour during printing.
Which filaments are most sensitive (and what that means in the UK)
Not all spools go bad at the same pace.
-
Very moisture-sensitive: nylon (PA) and some support materials (like PVA). If these live on an open shelf in a damp room, you can see problems quickly.
-
Moderately sensitive: PETG and TPU. These are common in community settings (stronger parts, flexible prints), and they’re frequent “mystery stringing” culprits.
-
Less sensitive (but not immune): PLA. PLA can look “fine” for longer — then surprise you during a humid stretch.
In many UK buildings, indoor humidity stays high for long stretches — which makes a predictable storage routine worth having.
Fix the spool you have right now (without guessing)
If the spool is already damp, the practical fix is simple: dry it.
If you’re searching how to dry filament, the key idea is the same across materials: use controlled heat long enough to drive moisture out, then move the spool straight into dry storage.
Airtight storage with desiccant helps prevent moisture uptake — but it’s usually too slow to reliably rescue a damp spool on its own. UltiMaker’s “3D printer filament storage: essential tips and ideas” (UltiMaker, 2025) is a solid baseline for prevention, but once symptoms show up, you generally need active drying.
Drying safety: avoid the “melted spool” incident
If you’ve ever seen a warped spool, you already know the risk: too much heat in the wrong place.
A practical rule of thumb from CNC Kitchen’s deep dive on drying methods is to stay below the material’s glass transition temperature and avoid uncontrolled oven swings.
⚠️ Warning: Don’t treat filament drying like cooking. Ovens can overshoot and hotspots can deform spools. If you can’t control temperature reliably, use purpose-built equipment.
Prevent it next time: a makerspace-friendly storage workflow
Here’s a simple workflow that works well when multiple people touch the same spools.
1) Decide what must stay dry
Prioritise dry storage for PETG/TPU and any nylon/PA or other highly hygroscopic materials. PLA can often be stored more casually — but if your space runs humid, treat PLA like everything else.
2) Make “end of session” storage non-negotiable
The biggest moisture failures in shared spaces aren’t technical — they’re procedural.
-
Put spools away the same way you put tools away.
-
Label boxes/bags with material type and date opened.
-
Keep a cheap humidity meter in the storage area.
For more practical storage tips (including how bad storage can lead to brittle/snapping filament), Sovol UK’s guide on common causes of filament snapping and how to stop it is a useful companion read.
Choosing the right prevention setup: bag, dry box, or filament dryer?
This is where most teams either overspend… or keep paying the failed-print tax.
Option A: Sealed bag or box + desiccant (lowest cost)
Choose this if:
-
you mostly print PLA
-
your usage is occasional
-
you’re disciplined about sealing spools immediately
Trade-off: great for prevention, slower for “rescue.”
Option B: A dry box you can print from (better day-to-day control)
Choose this if:
-
spools sit on the printer for long sessions
-
you’re in a shared environment where spools tend to be left out
-
you want consistent handling with fewer steps
Trade-off: slower to rescue a spool that’s already wet.
Option C: An active filament dryer (best for repeatability with PETG/TPU/nylon)
Choose this if:
-
you regularly print PETG/TPU
-
your space is often humid
-
you care about uptime and don’t want to re-tune for every spool
A dryer is also the “least arguing” solution in a community setting: instead of debating whether someone messed with retraction, you standardise a known-good input condition.
If you’re evaluating dryers, the temperature control range, capacity, and whether you can print directly from the unit matter more than marketing claims. As a practical UK-available option, Sovol’s Sovol SH02 Filament Dryer Box is one example of a dedicated dryer designed for this workflow.
Next steps (low-pressure, but practical)
If damp spools are a recurring problem in your space, aim to standardise two things:
-
Storage discipline (sealed + labelled + monitored)
-
A reliable way to dry spools when symptoms show up
If you want to compare dryer options that ship locally, start with the filament dryer collection on Sovol UK and choose based on capacity and day-to-day workflow fit.
FAQ
Can wet filament cause stringing?
Yes. Moisture can make extrusion less consistent, which often shows up as stringing and oozing — especially when a spool that used to be clean suddenly gets messy.
If you’re troubleshooting stringing wet filament, dry the spool first. Only after that should you chase retraction and temperature tuning.
Is popping from the nozzle always wet filament?
It’s one of the strongest signals. If you hear popping/hissing and see bubbles or surface pitting, moisture is a very likely root cause.
Can I fix wet filament just by storing it with silica gel?
Silica gel is excellent for prevention, but it’s usually too slow to rescue a wet spool quickly. If print symptoms are already showing, active drying is the practical fix.
Which materials need drying most often?
In most community settings: nylon/PA first, then PETG and TPU. PLA is less sensitive, but it can still absorb enough moisture to cause problems in humid environments.
Share:
3D printer first layer not sticking: a practical fix order that actually works
How to Improve 3D Print Quality With a Better 3D Printer Setup