If you’re running a printer for a makerspace (or you’re the person everyone asks when prints fail), “better results” usually means three things:
-
Higher success rate (fewer abandoned prints and clogged-nozzle rescues)
-
Repeatability (the next user gets the same outcome with the same file)
-
Teachability (you can explain why a change helped, and when it won’t)
This guide is setup-first. No magic settings—just a workflow you can standardise.
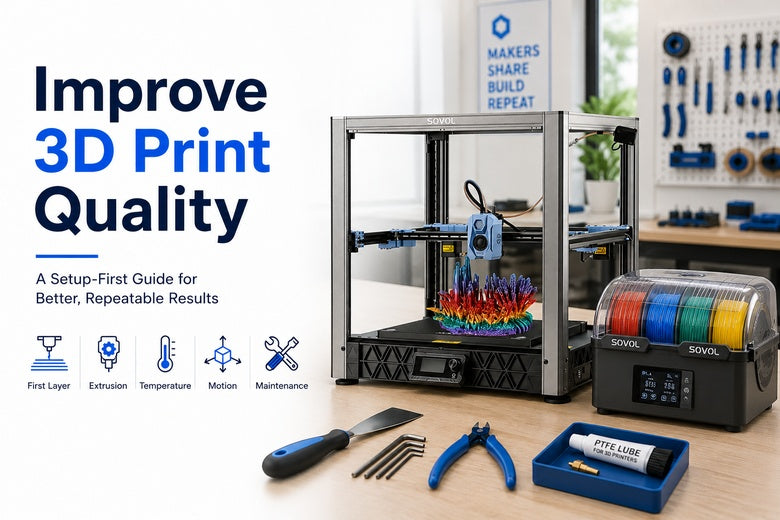
Improve 3D print quality by standardising your setup first
Before you tune anything, make sure your process is designed for shared use:
-
Pick one baseline filament (e.g., PLA from a known-good spool) and keep it for calibration.
-
Pick one baseline profile in your slicer (and name it clearly).
-
Log every change: date, filament, nozzle size, slicer version, and what you changed.
-
Change one variable at a time. If you change temperature, retraction and speed, you won’t know what actually fixed the issue.
A sensible calibration order is: first layer → extrusion → temperature → motion. Sovol’s own blog has a learning-path piece that follows this general logic, which can be useful for training new members (see 3D Printing Learning Path: From First Print to Full Projects).
Pro Tip: Keep a folder of “verification prints” on your makerspace PC (first-layer square, temp tower, retraction test, flow cube). It turns tuning into a 20-minute routine instead of a week-long mystery.
A quick 3D printer calibration checklist
Use this before every “big tweak”:
-
Clean the bed and confirm first-layer behaviour
-
Level/mesh the bed (if supported)
-
Set Z offset at printing temperature
-
Calibrate extrusion (E-steps/flow)
-
Run a temperature tower
-
Tune retraction and cooling (only if stringing/overhangs are an issue)
-
Reduce ringing/ghosting with mechanical checks and conservative motion settings
If you do only one thing from this article: do the checklist in that order.
Best practice 1: Fix the first layer before you touch anything else
When prints fail, the first layer is the usual starting point. Even when a print finishes, many surface and dimensional issues start as a slightly-wrong first layer.
What “good” looks like
Run a single-layer square (or a large single-layer sheet):
-
Lines are slightly squished and touch edge-to-edge
-
No gaps between lines
-
No raised ridges or “ploughed field” texture
-
The nozzle doesn’t scrape the bed
How to fix it (in a controlled way)
-
Clean the bed properly
Finger oils and residue matter more than people want to admit. A wiped-down bed saves time.
-
Level or mesh the bed at temperature
Heat changes the geometry. If you’re on Klipper, the official bed levelling documentation is a solid reference for how meshes and Z limits interact.
-
Set Z offset after levelling
Z offset is your fine adjustment after the bed is “as level as it can reasonably be.” Many manufacturer guides (including Anycubic’s) emphasise the same order: level first, then tune Z offset.
Key Takeaway: Don’t treat auto levelling as a magic wand. You still need a clean surface and a sane Z offset.
If you want more depth on this specific failure mode, Sovol has a dedicated internal guide on improving first-layer adhesion.
Best practice 2: Calibrate extrusion so your printer stops “lying” about flow
If your first layer is good but the rest of the print is inconsistent, extrusion calibration is often the missing piece.
Common symptoms extrusion calibration can fix
-
Under-extrusion gaps, weak walls, brittle parts
-
Over-extrusion blobs, rounded corners, elephant’s foot
-
Weird surface texture that looks like “too much plastic” in some areas
What to do
-
E-steps (firmware-side): ensures the extruder feeds the correct length of filament.
-
Flow/extrusion multiplier (slicer-side): compensates for real-world filament and hotend behaviour.
A practical method is printing a single-wall (or two-wall) calibration cube and measuring the wall thickness with calipers, then adjusting flow so measured thickness matches the target.
Best practice 3: Tune temperature with a tower, not vibes
Temperature affects almost everything: layer adhesion, stringing, bridging, and surface finish.
Print a temperature tower for the filament you actually use. Pick the band that gives you:
-
clean bridges (not droopy)
-
minimal stringing
-
good layer bonding (no easily split layers)
Best practice 4: Use retraction and cooling as targeted tools
Retraction and cooling are where people often overcorrect.
When to tune retraction
Tune retraction when you see strings between separate features or blobs around travel moves.
Use a retraction test tower and adjust until strings reduce without causing gaps at the start of lines or clicking/grinding at the extruder.
When to tune cooling
Cooling is most useful when overhangs droop, bridges sag, or small parts look melted. But too much cooling can reduce layer adhesion on some materials.
Best practice 5: Filament drying for 3D printing (UK humidity reality)
The UK is not kind to open spools.
How to tell filament is wet
Look (and listen) for popping/hissing at the nozzle, bubbles in extrusion, rough surfaces, and brittle parts.
Drying without damaging the spool
As a conservative starting point:
-
PLA: ~40–50°C
-
PETG: ~55–65°C
-
TPU: ~40–55°C
-
ABS: ~75–80°C
-
Nylon: ~80–95°C
Prusa’s knowledge base on drying filament makes a useful point: the best “drying plan” is storage that avoids needing to dry constantly.
Best practice 6: Reduce ringing and ghosting with boring mechanical discipline
Ringing/ghosting (ripples near corners) is usually vibration.
Start with mechanics before firmware wizardry:
-
tighten loose screws and pulleys
-
check belt tension (not slack, not banjo-tight)
-
put the printer on a stable surface
Polymaker’s overview of ghosting/echo/ringing includes a simple vibration-damping idea (adding soft pads under feet) alongside the usual motion advice.
If ringing persists after mechanical checks, reduce acceleration/jerk and re-test on a ringing tower.
Best practice 7: Maintenance is a quality setting (use a simple cadence)
A makerspace printer isn’t a personal machine. Treat it like shared infrastructure.
Before every print (user checklist)
-
wipe bed
-
quick nozzle check (no blob on the tip)
-
confirm filament feeds smoothly
Weekly (staff/mentor)
-
check belt tension
-
remove dust from fans and vents
-
light clean + lubrication of rails/rods (as appropriate)
-
quick verification print
Monthly
-
deeper clean, fastener check
-
review firmware updates and back up profiles
If you want a template you can adapt, start with Sovol’s internal 3D printer maintenance checklist.
⚠️ Warning: If you’re seeing warping or corner lift, don’t “fix it” by cranking bed temperature and hoping. Start with the first layer, cleanliness, and airflow.
Symptom → cause → first check (a quick troubleshooting map)
Use this as a “first response” flow when someone says “the printer’s broken”:
-
Print won’t stick → dirty bed / Z offset too high → clean bed, re-check Z offset
-
Elephant’s foot → nozzle too low / over-extrusion / bed too hot → raise Z offset slightly, re-check flow
-
Stringing → temperature too high / wet filament / retraction off → dry filament, run temp tower, retraction test
-
Gaps in walls → under-extrusion / partial clog → check nozzle, calibrate flow
-
Ripples near corners → vibration / accel too high → tighten belts, stabilise printer, lower acceleration
For deeper defect-by-defect diagnostics, Simplify3D’s print quality troubleshooting guide is a useful general reference to keep bookmarked.
Next steps
If you want to make this stick in a shared space, create three things:
-
A one-page “before you print” checklist next to the machine
-
A baseline slicer profile with a clearly named version number
-
A shared logbook for changes and failures
When you’re standardising machines, it also helps to keep firmware and manuals easy to find in one place. Sovol’s UK site has a central hub to download firmware and manuals.
If you’re evaluating printers for reliability and teachability, Sovol is worth considering as one option—especially if you value open-source friendliness and local UK dispatch/support. (The workflow above applies no matter what brand you run.)
Share:
Why wet filament causes bad 3D prints
Large Build Volume vs High Speed: Which Matters More for Large-Format 3D Printing?