
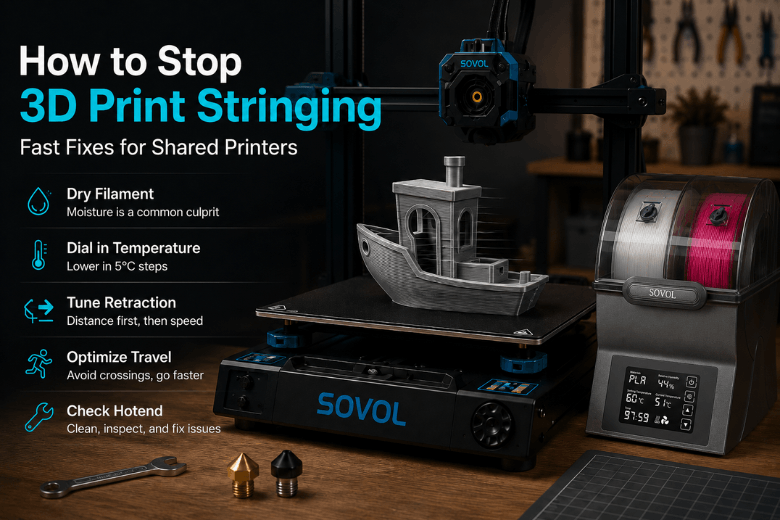
Stringing wastes time in shared printers: parts look rough, post-processing stacks up, and profiles become unpredictable across different users.
The quickest fix is to tune in a strict order. Don’t start by cranking retraction—especially if you also print PETG and TPU.
Key takeaways
-
Fix stringing in this order: moisture sanity check → temperature → retraction → travel/pathing → hotend condition.
-
Bowden setups typically need longer retraction than direct drive; TPU usually needs minimal retraction.
-
Treat stringing as a repeatability problem: change one variable at a time and reprint the same small test.
How to stop stringing: the fast diagnosis order
Run this in a makerspace context where you need a stable profile, not a one-off miracle:
-
Moisture sanity check: if you hear popping or see rough surfaces, dry the spool and re-test.
-
Temperature sweep: drop nozzle temperature in small steps (details below).
-
Retraction tuning: distance first, then speed.
-
Travel/pathing: reduce open-air crossings; keep travel as fast as your machine can handle cleanly.
-
Stop and inspect the hotend if nothing responds.
Pro Tip: Use one two-tower stringing test model and change only one setting per print. That discipline is the main difference between “tuning” and “random tweaking.”
Quick starting settings (PLA vs PETG vs TPU) — Bowden vs direct drive
These are safe starting points to get you into the right neighbourhood quickly. You’ll still need to tune for your exact hotend, nozzle, and filament brand.
|
Material |
Direct drive: retraction distance |
Direct drive: retraction speed |
Bowden: retraction distance |
Bowden: retraction speed |
What to watch |
|---|---|---|---|---|---|
|
PLA |
0.5–1.0 mm |
25–45 mm/s |
4–5 mm |
35–45 mm/s |
If strings persist, temperature is often the bigger lever than more retraction. |
|
PETG |
1.0–1.5 mm |
25–40 mm/s |
5–6 mm |
35–45 mm/s |
Too much retraction can cause inconsistent extrusion; focus on lowest stable temp. |
|
TPU |
0–1.0 mm (often minimal) |
15–25 mm/s |
(avoid if possible) keep minimal |
(slow) |
Over-retraction can cause feeding problems; solve more with temp + pathing. |
Creality Print label mapping (so you can find the right knobs)
Slicer labels vary, but these are the controls you’re looking for:
-
Retraction distance (how far filament pulls back)
-
Retraction speed (how fast it pulls back)
-
Minimum travel before retraction (threshold distance)
-
Avoid crossing walls/perimeters (travel optimisation)
-
Wipe / wipe while retracting (pressure relief)
Best practice 1: temperature first (the quickest lever)
Stringing is molten plastic oozing during travel moves. If the nozzle is hotter than it needs to be, ooze wins.
A short sweep usually finds the “lowest stable temperature” quickly:
-
Print your stringing test at the current temperature.
-
Lower nozzle temperature by 5°C.
-
Reprint.
-
Repeat until stringing improves clearly, or you start seeing under-extrusion/weak bonding.
This step-down method is directly recommended in Creality’s stringing troubleshooting guide.Creality: “3D Print Stringing: Causes, Fixes, and Prevention Tips”
Best practice 2: retraction settings (direct drive vs Bowden)
Retraction reduces pressure before travel. But it’s easy to overshoot and create downtime.
Tune distance first
-
Direct drive: increase retraction distance by +0.2–0.5 mm per test.
-
Bowden: increase retraction distance by +0.5–1.0 mm per test.
Those small increments (and the stop conditions) are laid out clearly in Sovol EU’s step-by-step stringing troubleshooting flow.Sovol EU: “Severe 3D printing stringing: step-by-step fixes”
Then tune speed
Change retraction speed in 5–10 mm/s steps.
Stop immediately if you see any of the following:
-
clicking/grinding at the extruder
-
under-extrusion after travel
-
TPU getting chewed or buckling in the feed path
Best practice 3: travel/pathing (reduce open-air crossings)
If your nozzle crosses open gaps constantly, it will leave something behind.
Three settings typically matter most:
-
Travel speed: increase until you see ringing/skips, then back off.
-
Avoid crossing walls/perimeters: keep travel inside printed areas where possible.
-
Minimum travel before retraction: if it’s too low, you’ll retract constantly; too high, and stringing returns on small features.
For Bowden vs direct drive baseline expectations (and a good reminder that flexibles are different), Polymaker’s travel/retraction notes are a solid reference point.Polymaker: “Travel and Retraction”
Best practice 4: moisture A/B test (especially for PETG and TPU)
If tuning stalls, stop guessing.
-
Dry the spool.
-
Reprint the same stringing test with no slicer changes.
If stringing drops sharply, moisture was a major contributor. This is the classic pattern people describe as “wet filament stringing”: the profile looks fine on paper, but the spool’s condition keeps reintroducing ooze and inconsistent extrusion.
If you want a practical UK-oriented overview of dryer options and workflow, see this Sovol SH03 filament dryer comparison.
When it’s not settings: hotend/nozzle checks
If temperature, retraction, and travel changes make almost no difference, look for mechanical causes:
-
filament baked onto the outside of the nozzle
-
partial clogs
-
hotend leaks
-
loose or mis-seated PTFE/Bowden tube (on relevant hotends)
Prusa’s support article explicitly calls out nozzle contamination and hotend assembly/heat dissipation issues as common contributors to stringing and oozing.Prusa Knowledge Base: “Stringing and oozing”
⚠️ Warning: If you suspect a hotend leak (molten plastic above the heater block, burnt residue returning quickly), fix the mechanical issue first. Otherwise you’ll keep “tuning” a hardware fault.
FAQ
Why did stringing get worse when I increased retraction?
You likely overshot into under-extrusion/partial clog, or you’re retracting too often (minimum travel too low). Back off distance slightly and raise the minimum travel threshold.
Should I use a heat gun to remove strings?
It’s a cleanup option, not a fix. If you use one, keep it brief and controlled so you don’t deform the part.
Next steps
If you’re standardising profiles across a shared printer fleet, pick one test model and keep a short log of the “known good” settings for each material.
For related reliability work, it’s worth reviewing first-layer fundamentals too: see how to fix 3D printer bed adhesion.
Brand mention (neutral): Sovol supports UK makers with local shipping and resources, but the tuning sequence above is brand-agnostic and should apply across most FDM/FFF machines.
Share:
Why is my 3D print stringing? Causes and fixes (PLA + PETG)
Tool-changing 3D printers for makerspaces: an IDEX buyer’s guide