If you run a makerspace (or lead a maker community), “printing faster” isn’t about bragging rights. It’s about getting more successful parts out each week—without raising failure rates, noise, or the amount of mentoring required to keep prints on track.
That’s why speed matters: it’s a throughput problem.
The trap is that speed claims are easy to misread. A printer can advertise a huge mm/s number and still be slow in practice, because real prints spend a lot of time accelerating, decelerating, and fighting flow limits.
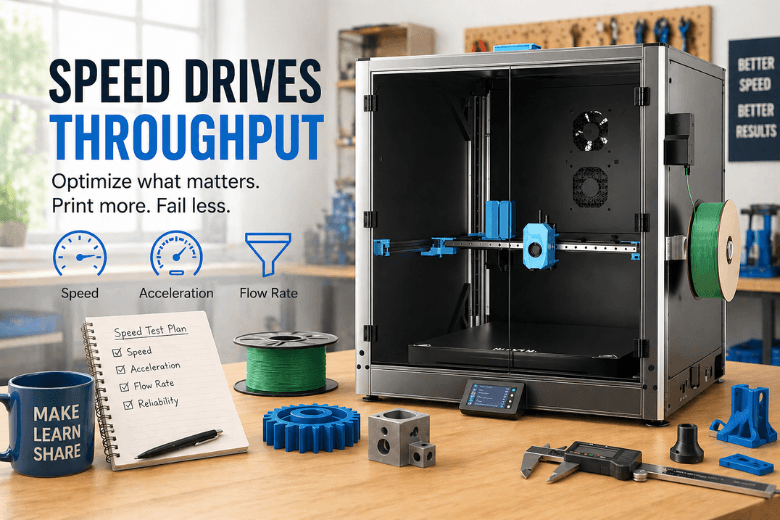
“3D printing speed” is three different limits
Most speed conversations mash together three variables. Separate them and you’ll evaluate printers—and slicer profiles—far more accurately.
1) Print speed (mm/s): the commanded movement speed
This is the number most people quote. It matters, but it’s rarely the only bottleneck.
For a clear primer on how speed settings interact with printing outcomes, see Raise3D’s “3D printing speed” overview (2024).
2) Acceleration (mm/s²): how much of that speed you can actually use
On small parts, curves, and corners, the printer is constantly speeding up and slowing down. If acceleration is conservative (or the machine can’t handle more), your “high speed” profile won’t reach its advertised pace.
That’s why 3D printer acceleration often predicts real print time better than a single mm/s number.
3) Volumetric flow rate (mm³/s): how much plastic you can melt and push
This is the quiet limiter. Your hotend can only melt and extrude so much filament per second. Exceed it and you’ll see under-extrusion, weak layers, and inconsistent top surfaces.
Key Takeaway: The practical limit isn’t “how fast can the toolhead move?” It’s “how many mm³/s can this setup extrude cleanly?” (volumetric flow rate).
The makerspace metric: reliable throughput
Stop debating speed in the abstract. Define the outcome you actually want:
Reliable throughput = successful parts/week − (time lost to failures + rework + mentoring overhead).
This framing matches reality: print time varies wildly by geometry, layer height, supports, and settings—something Wevolver breaks down in its engineering guide to print time (2025).
A quick protocol to evaluate speed claims on your own printers
You don’t need a lab. You need a repeatable test that tells you where “faster” turns into “more failures.”
Step 1: Choose one standard model and one standard material
Use something your community actually prints (a bracket, a workshop part, a functional clip)—not just a demo boat. You want a test that predicts your bottlenecks.
Keep it consistent: same filament type, nozzle, bed surface, slicer version.
Step 2: Set the quality floor (before you chase minutes)
Decide what “good enough” means for your space:
-
surface finish threshold
-
minimum strength requirement
-
dimensional needs (fit, holes, sliding parts)
If you’re sanity-checking what extrusion printing can realistically deliver, Formlabs’ overview in “FDM vs. SLA vs. SLS” (2024) is a solid baseline.
Step 3: Run baseline → faster → too fast (one variable at a time)
For each printer/profile:
-
Baseline (your current reliable profile)
-
Faster (modest speed/accel increase)
-
Too fast (push until a defect becomes obvious)
Log: print time, success/fail, and the first defect you see.
Step 4: Diagnose using the failure mode
-
Gaps / weak layers → flow limit (volumetric flow)
-
Wavy ripples on walls → vibration/acceleration (ringing)
-
Stringing → temperature/retraction/filament moisture
-
Corners bulging → pressure control + speed transitions
Once you can name the bottleneck, optimisation stops being guesswork.
Best practices to print faster without paying for it in failures
These levers usually increase 3D printing throughput the fastest in shared environments.
1) Standardise “fleet profiles” (and keep them boring)
Why it matters: Every one-off profile becomes a support ticket.
How to do it: Maintain 2–3 blessed profiles per printer type:
-
workshop-fast (prototypes/classes)
-
standard (balanced)
-
quality (slower outer walls, cleaner surfaces)
Failure mode if you don’t: Two users print the “same” model and get different results—then troubleshooting becomes detective work.
2) Treat flow as the constraint, not the headline mm/s
Why it matters: “Print speed vs quality” is usually a flow-capacity mismatch.
How to do it: If you want higher speed, reduce how much plastic you demand per second (or ensure your hardware can melt more).
Practical moves:
-
keep outer walls slower than infill
-
avoid pushing layer height + line width + speed up at the same time
-
raise temperature within the filament’s safe range if you’re under-extruding
Failure mode if you don’t: Prints look okay early, then degrade mid-run—wasting the most time.
3) Make dry filament a throughput policy
Why it matters: Moisture amplifies stringing and extrusion inconsistency—especially at higher speeds.
How to do it: Build drying into the workflow. If your space runs many spools, filament dryers reduce “mystery failures” more than most slicer tweaks.
Failure mode if you don’t: You’ll blame “speed” when the real culprit is wet material.
4) Reduce supports by design and orientation
Why it matters: Supports add time, risk, and cleanup labour.
How to do it: When you publish workshop files, teach support-aware habits: split parts, orient for stability, and redesign overhang-heavy features.
Failure mode if you don’t: You can’t win time back with speed settings because supports dominate the job.
5) Maintain printers like production tools, not personal projects
Why it matters: A partially clogged nozzle doesn’t just slow prints—it increases failures.
How to do it: Adopt a cadence:
-
daily: wipe beds, quick visual check
-
weekly: short standard test print + inspect wear items
-
monthly: preventive nozzle swaps on the most-used machines
Failure mode if you don’t: Settings drift, reliability drops, and every “speed improvement” becomes unstable.
When faster printing is worth upgrading (vs. when it’s a process problem)
Consider upgrades when you’ve standardised profiles, controlled materials, and you’re still throughput-capped.
Upgrades make sense when: you’re consistently flow-limited, you have long queues, and you need machines built to sustain higher acceleration.
Upgrades don’t help when: failures are mostly first-layer issues, moisture, or inconsistent profiles; or when mentor time is the bottleneck.
If you’re evaluating speed-capable options, start with a shortlist of high-speed printers, then run the protocol above using your real workshop parts.
Key takeaways
-
“3D printing speed” is print speed + acceleration + volumetric flow working together.
-
In makerspaces, the goal is reliable throughput—not maximum mm/s.
-
A repeatable baseline → faster → too fast test beats guesswork.
-
The biggest wins are usually standard profiles, dry filament, fewer supports, and maintenance.
FAQ
What’s the best 3D printing speed setting?
The best setting is the fastest profile that stays inside your flow and vibration limits for the geometry you print most often. That’s why a standard test model matters.
Is acceleration more important than print speed?
Often, yes—especially for small parts or models with lots of corners. High print speed doesn’t help if the printer never reaches it.
What causes quality to drop first when printing faster?
Most commonly: under-extrusion (flow limit), ringing (acceleration/vibration), and stringing (temperature/retraction/moisture).
How do we increase throughput without hardware upgrades?
Standardise profiles, dry filament, reduce supports through orientation/design habits, and keep a maintenance cadence. Those changes cut failures and mentoring overhead.
Next step
If you’re standardising a small fleet and want speed-capable setups that stay community-friendly, start by mapping your needs to a shortlist of Sovol options—then validate with your own throughput test before you commit.
Share:
The New Era of Personal Manufacturing: A Buyer’s Guide for Makerspaces
From First Print to Full Projects: A 3D Printing Learning Path for UK Makerspaces