If you run a makerspace, you’ve seen the pattern:
-
A beginner gets one good print.
-
Everyone celebrates.
-
Then the next five prints fail for five different reasons.
The goal isn’t “a first print.” The goal is repeatable success—because repeatability is what keeps workshops moving, keeps machines available, and keeps members confident.
This guide lays out a practical “from first print to full projects” learning path you can teach and standardise. It’s written for UK makerspace and community leaders who care about uptime, clean workflows, and open-source-friendly tooling—not hype.
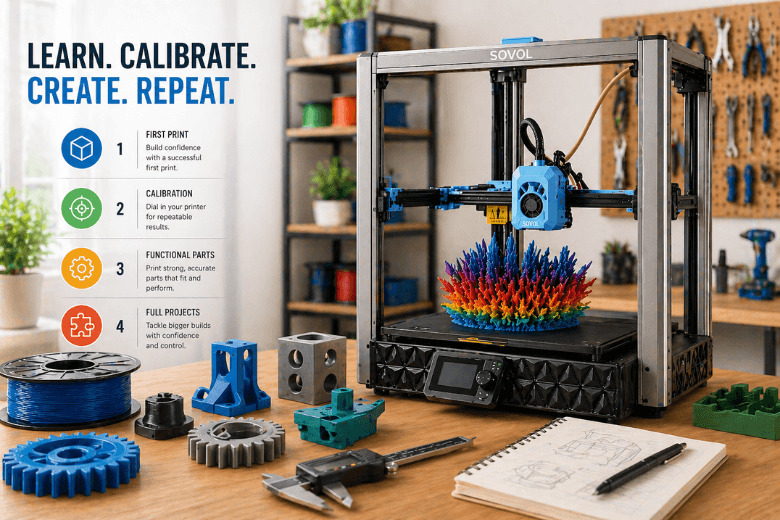
The “from first print to full projects” learning path (in 4 stages)
A useful 3D printing learning path has clear stage gates. Here’s the simplest version that works in real community settings:
-
Stage 1: First print that actually teaches something (foundation)
-
Stage 2: Calibration prints (turn random success into repeatable success)
-
Stage 3: Functional parts (strength, fit, tolerances)
-
Stage 4: Full projects (multi-part builds, larger prints, process control)
Pro Tip: Don’t let beginners “level up” by vibe. Let them level up by passing simple, repeatable checks.
Stage 1: The first print that teaches (not just a lucky win)
What you’re trying to prove
At Stage 1, you’re not proving the printer is “good.” You’re proving three basics:
-
The machine can lay down a consistent first layer.
-
The filament is feeding cleanly.
-
The slicer profile isn’t doing anything weird.
In practice, Stage 1 lives or dies on first layer adhesion—because if the first layer doesn’t stick cleanly, nothing else you tune will matter.
If you want a short primer for how FFF works (useful for new mentors too), Raise3D’s overview of FFF 3D printing basics (2024) is a solid reference.
The Stage 1 checklist
-
Clean build surface (finger oils are silent failure).
-
Correct first-layer height (Z-offset) and a sensible first-layer speed.
-
Dry-enough filament (if you hear popping or see bubbles, stop and dry it).
You’re ready to move on when…
-
You can print the same simple part twice with similar first-layer quality.
-
The first layer sticks without “heroics” (no random glue rituals that only one mentor understands).
Stage 2: FFF/FDM calibration prints that turn chaos into a system
Calibration isn’t a rite of passage. It’s a way to stop wasting everyone’s time.
Wevolver’s guide on how to calibrate a 3D printer (2026) recommends a sensible order (bed/first layer → extrusion → temperature → motion). That order works well in makerspaces because it prevents you chasing symptoms.
The few calibration prints that matter most
A quick note on terminology: “FDM” and “FFF” are often used interchangeably in community spaces. This guide uses FFF as the more precise term, but the calibration prints are the same either way.
1) First-layer test (single layer grid / squares)
-
Diagnoses: Z-offset and bed flatness issues.
-
If it fails: fix Z-offset/leveling before touching anything else.
2) Temperature tower
-
Diagnoses: too-hot vs too-cold printing for that filament (stringing vs weak layer bonding).
3) Retraction test
-
Diagnoses: stringing/oozing between travel moves.
-
Common trap: raising retraction too far can cause under-extrusion or jams.
4) Flow / extrusion test (thin-wall cube or top surface test)
-
Diagnoses: under/over extrusion (gaps vs blobs) and helps improve dimensional accuracy.
5) High-speed “tall tower” sanity check
-
Diagnoses: layer shifts, loose belts, resonance issues.
-
If you see shifts or weird banding, it’s often mechanical. Filament2Print’s breakdown of common mechanical problems in FDM printers (2022) is a useful troubleshooting map.
⚠️ Warning: Don’t mix “tuning” and “teaching” on the same print. Beginners need stable profiles. Mentors can iterate profiles separately, then publish them.
You’re ready to move on when…
-
Your baseline profile produces clean results on the big three: first layer, stringing, and top surfaces.
-
A new member can follow your checklist and get a passable print without a mentor hovering.
Stage 3: Functional parts (where projects start to feel real)
Stage 3 is where people stop printing trinkets and start printing parts that have to fit, survive load, and assemble.
What changes at this stage
-
Orientation becomes engineering, not aesthetics.
-
Tolerances become real (holes, pegs, snap-fits).
-
Material choice matters (PLA vs PETG vs ABS, etc.).
Three habits that unlock functional prints
1) Design for how FFF parts are actually strong Printed parts are usually weaker along the layer lines. So when a part keeps snapping, the fix is often orientation, wall count, or temperature—not “add more infill.”
2) Treat fit as a testable parameter Pick one small “fit test” model your makerspace uses for every machine and material. Keep notes on:
-
what hole sizes actually fit M3 / M4 hardware after printing
-
how much clearance you need for sliding fits
3) Run defect triage like a checklist When prints fail, don’t let the room invent new theories each time. Use a repeatable map. Additive-X’s guide to common 3D printing problems and solutions (2022) is a good baseline for symptoms → likely causes.
You’re ready to move on when…
-
Members can print a functional bracket/enclosure piece that fits on the first or second attempt.
-
You have at least one “approved” profile per common material.
Stage 4: Full projects (multi-part builds + large prints + process control)
“Full projects” usually mean one of these:
-
A multi-part assembly that needs consistent tolerances.
-
A big print that runs long enough for small issues to become catastrophic.
-
A set of repeated parts for a class or event.
The Stage 4 playbook
1) Split the project intentionally Big single-piece prints are tempting, but splitting can reduce risk:
-
shorter individual print times
-
easier reprints when one part fails
-
better orientation per part for strength
2) Add process control, not more hope
-
Standardise filament handling (dry boxes, labels for “opened on” date).
-
Publish profiles like software releases (“PLA profile v1.3”).
-
Keep a simple failure log: what happened, what changed, what fixed it.
3) Use the right tool for large-format and throughput If your makerspace is moving into genuinely large projects (props, big enclosures, workshop fixtures), a large-format machine can reduce the pain of constant splitting.
A concrete example is the Sovol SV08 Max, which is positioned as a large-format CoreXY printer with Klipper-based control and automated bed levelling features. Treat the headline speed numbers as “up to” claims—your real throughput will depend on profile stability, material, and how well you’ve standardised your workflow.
If you’re running an SV08 Max in a shared space, Sovol’s own SV08 Max setup and calibration tips are worth skimming for the basics (auto-levelling, profile discipline, and maintenance routines).
You’re ready to call it “full projects” when…
-
Your makerspace can complete a multi-part build with predictable fit.
-
You can run a workshop day without the printers becoming a constant emergency.
The makerspace scaling kit (steal this and make it yours)
Here’s the lightweight kit that helps reduce failed prints without turning your makerspace into a bureaucracy.
1) One-page onboarding (15 minutes)
-
What the printer is allowed to do unsupervised (and what requires a mentor).
-
How to run the first-layer check.
-
Where profiles live.
-
How to report a failed print (with photos).
2) Standard profiles (per material)
-
A conservative “teaching profile” (slower, reliable).
-
An “experienced user” profile (faster, but still sane).
3) Maintenance cadence
-
Daily: wipe bed, quick nozzle check.
-
Weekly: check belt tension, quick motion inspection.
-
Monthly: rails/lead screws lubrication as appropriate, deeper clean.
4) A failure log that builds institutional memory
A good log entry is simple:
-
material + profile version
-
symptom (first layer won’t stick, stringing, layer shift)
-
what changed
-
what fixed it
Next steps
If you want to turn this into a teachable programme, do this next:
-
Pick one baseline test model and make it part of onboarding.
-
Publish one conservative PLA profile and freeze it for 30 days.
-
Run a “failure retro” once a month: top 3 failure causes, top 3 fixes.
Key takeaways
-
“From first print to full projects” is a system: first-layer reliability → calibration → functional parts → process control.
-
Makerspaces win by standardising profiles and checklists, not by relying on one expert mentor.
-
Treat failures as data: log them, fix one variable at a time, and publish profile versions.
-
Large-format projects often benefit from large-format machines—but only after your workflow is stable.
Share:
Why 3D Printing Speed Matters in Modern 3D Printing
Your First 3D Printer Changes Everything