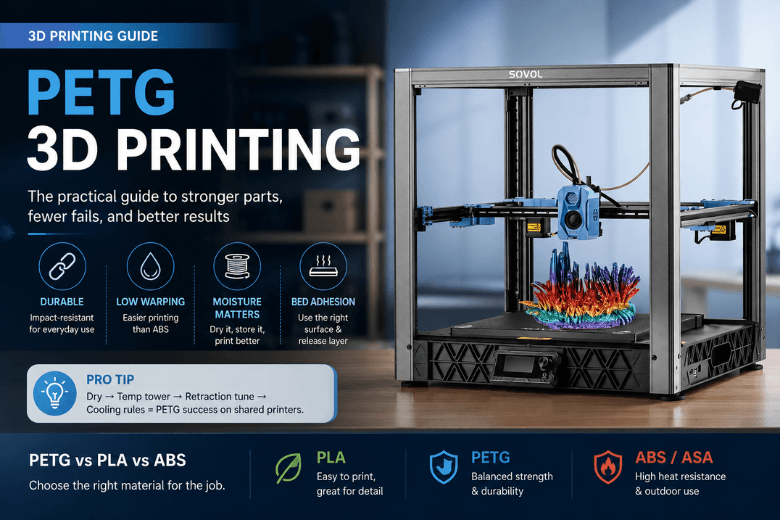
PETG sits in a very useful middle ground: more forgiving (and usually lower-fuss) than ABS/ASA, but more impact‑resistant and “everyday durable” than PLA.
If you run a makerspace, teach workshops, or simply support a community of printers, the question isn’t “Is PETG good?” It’s when PETG reduces your failure rate and maintenance burden, and when it quietly creates new problems (stringing, messy surfaces, parts welded to the bed).
Key takeaways
-
Use PETG when you need functional parts that survive handling (brackets, guards, enclosures) and PLA feels too brittle or heat-sensitive.
-
Avoid PETG when your part needs crisp details or clean bridging—PLA is often the smoother ride.
-
Treat moisture control as a first-class PETG skill. If PETG starts stringing “for no reason,” drying and storage are usually the fastest win.
-
PETG can stick too well to some build surfaces. A release layer (or the right plate) prevents damaged beds and broken parts.
-
For shared printers, PETG works best when you standardise a baseline: dry → temp tower → retraction tune → cooling rules.
A quick decision: when to use PETG (and when not to)
Choose PETG when:
-
You’re printing functional parts that will be handled, bumped, squeezed, or used repeatedly.
-
You want strong layer-to-layer bonding (PETG often shines here).
-
You want a material that’s usually less warp-prone than ABS while still feeling “less fragile” than PLA.
-
You need a balance of durability + ease of printing for mixed-experience users.
Skip PETG (or treat it as a “not today” material) when:
-
You need sharp corners, crisp text, or display-quality surface finish with minimal tuning.
-
Your part depends on long bridges or clean overhangs.
-
The print environment is already prone to mess (PETG’s stringing can turn a shared printer into a cobweb factory).
-
The part will live outdoors in harsh UV or near higher heat—ASA is often a better fit for that job.
PETG vs PLA vs ABS/ASA (what actually matters day-to-day)
Use this table as an “operator’s view” rather than a lab-spec comparison.
|
Criteria |
PLA |
PETG |
ABS / ASA |
|---|---|---|---|
|
Best for |
Visual models, prototypes, crisp detail |
Functional parts, general-purpose durability |
Higher heat use; ASA for outdoor weathering |
|
Durability under handling |
Often brittle |
Usually impact-resistant / tough |
Tough, but printing can be fussier |
|
Warping risk |
Low |
Low–moderate |
Higher (ABS especially) |
|
Bridging / overhang behaviour |
Often best |
Often trickier |
Can be tricky without enclosure tuning |
|
Odour / ventilation burden |
Low (still ventilate) |
Often low odour (still ventilate) |
Typically higher; plan enclosure + ventilation |
|
Common failure modes |
Heat-softening, brittleness |
Stringing, over-adhesion, moisture issues |
Warping, fumes, enclosure/thermal issues |
|
Shared-space friendliness |
High |
Medium–high (if you standardise baselines) |
Medium–low unless you have controls |
For a higher-level properties framing across PLA/PETG/ABS, UltiMaker’s comparison is a useful reference point: PETG vs PLA vs ABS strength trade-offs (UltiMaker, 2025).
What PETG filament is (in practical terms)
PETG is a glycol‑modified version of PET (the plastic family used in many everyday products). In 3D printing terms, it’s typically chosen because it can deliver:
-
tougher parts than PLA (less “snap and crack”)
-
good layer adhesion
-
low warping compared with many ABS workflows
-
a glossy finish, and sometimes a nice translucent look
Sovol’s own materials overview positions PETG as a “best of both worlds” option between PLA and ABS, and notes a typical PETG printing temperature range around 230–250°C.
What PETG is good at (the reason people keep coming back)
Durable functional parts in busy environments
In community settings, a successful material is one that survives:
-
tool use
-
repeated assembly/disassembly
-
knocks and drops
-
“someone tightened that bolt one more turn”
PETG is a strong candidate for:
-
brackets and mounts
-
guards and covers
-
enclosures
-
workshop fixtures and jigs
Low-warp printing without a full ABS setup
If your space doesn’t support “ABS discipline” (enclosures, controlled airflow, strong ventilation), PETG is often the pragmatic compromise: you get more functional durability than PLA, without turning every print into a thermal management project.
Strong layer bonding (when you tune cooling correctly)
PETG can produce parts that don’t delaminate as readily as poorly-cooled prints in other materials. The catch is that PETG often wants less cooling than PLA—which leads directly into its most common pain points.
Where PETG tends to disappoint (and why)
1) PETG stringing and surface mess
PETG commonly oozes during travel moves. In a makerspace, that shows up as “random strings everywhere,” even when the printer was fine last week.
In most cases, the fastest route to improvement is:
-
Dry the filament
-
Lower nozzle temperature a bit
-
Tune retraction
-
Then revisit cooling, speeds, and travel rules
A baseline troubleshooting reference for slicer levers (retraction, travel movement choices, and pressure management) is Simplify3D’s PETG materials guide.
2) Bridging isn’t PETG’s strength
If your part is basically a bridge test, PETG can be frustrating: it stays soft longer, so it sags. You can improve this with bridge-specific cooling and speed rules, but if your goal is “clean bridges with minimal effort,” PLA is still the easy recommendation.
3) PETG can bond too aggressively to the bed
This is the failure mode that catches people by surprise.
PETG can stick hard enough to:
-
damage a build surface
-
chip glass
-
break parts on removal
The fix is usually not exotic—just a release layer or a surface choice that’s known to behave well with PETG, plus avoiding an over-squished first layer.
⚠️ Warning: If you’re printing PETG on a shared printer fleet, standardise the “safe surface + release layer” rule. It prevents bed damage and avoids that one catastrophic print that takes a machine out of service.
Baseline PETG printing settings (a sensible starting point)
PETG varies by brand, colour, and printer. The goal here is not “perfect settings,” but a stable baseline that gets your success rate up quickly.
A common baseline range is:
-
Nozzle: ~230–250°C (Sovol also lists ~230–250°C for PETG) via Sovol’s filament materials overview
-
Bed: often ~75–90°C (baseline guidance) via Simplify3D’s PETG materials guide
-
Fan: low–moderate; more for bridges/overhangs, less when you need layer strength
For many communities, a better “baseline method” than copying someone else’s profile is to run a small calibration sequence:
-
temperature tower
-
retraction test
-
a simple overhang/bridge test
Sovol’s calibration walkthrough is a good internal reference for that workflow (including how to approach temperature and retraction tuning).
Pro Tip: If PETG suddenly starts stringing after a few weeks of printing fine, treat it as a moisture problem first, not a slicer problem.
Makerspace playbook: keep PETG consistent across many users
1) Make drying and storage the default, not the exception
If you run printers in the UK, you’re dealing with real-world humidity—especially if spools live out in the open.
Sovol’s calibration guide lists common “wet filament” symptoms and includes PETG drying guidance around 55–65°C.
If you want a simple operational policy:
-
Store PETG in airtight boxes with desiccant.
-
If a spool has been out, dry it before blaming the printer.
A filament dryer is optional—but in a shared environment, it can reduce repeated troubleshooting. If you’re evaluating dryers, Sovol’s UK store has a dedicated section here: filament dryers for PETG.
2) Standardise a “PETG-safe bed surface” rule
One printer fleet-killer is the combination of:
-
PETG
-
a surface it bonds too strongly to
-
a first layer that’s slightly over-squished
Write down the approved surface(s) and release layer guidance. Make it boring and repeatable.
3) Lock a baseline profile, then allow only two tuning knobs
For communities, too many tuning options create chaos. Consider a baseline PETG profile with only:
-
nozzle temperature (small steps)
-
retraction (small steps)
Everything else stays fixed unless a mentor changes it.
Troubleshooting map: symptom → likely cause → first fix
Stringing everywhere → Wet filament or too hot → Dry spool; reduce nozzle temp in small steps.
Blobs/zits at corners → Pressure/retraction mismatch → Slightly adjust retraction; review travel settings.
Overhangs look melted → Not enough cooling for geometry → Increase cooling only for overhangs/bridges.
Corners look weak / layers split → Too much cooling or too cold → Reduce fan; raise temp slightly.
Part welded to bed → Surface mismatch / too much squish → Add release layer; reduce first-layer squish.
Ventilation: a sensible, non-alarmist stance
No filament is truly “emission-free,” and smell isn’t a perfect indicator of exposure. But in practical makerspace terms:
-
PETG is often treated as a lower-odour, lower-burden indoor material than ABS/ASA.
-
ABS/ASA generally warrant more controls (enclosure + ventilation/filtration), especially for long prints and shared spaces.
If you need a quick reference for why ABS needs ventilation planning indoors, Flashforge lays out the case clearly here: ventilation considerations for ABS printing.
Next steps
If you want a repeatable PETG workflow for your community, start with two things:
-
A short PETG calibration routine (temp tower + retraction test)
-
A storage/drying policy that prevents “mystery stringing”
You can use Sovol’s internal guides as a starting point for that standardisation:
-
Sovol’s overview of PLA vs PETG vs ABS
And if you want PETG-ready storage/drying tools available with UK dispatch, Sovol’s UK store has options here: Sovol SH02 filament dryer.
Share:
How to Tell if Filament Is Wet (and What to Do Next)
What Can You Print with the Sovol SV08 Max Build Volume?