A “big build volume” is easy to love in theory. In a makerspace, it’s only valuable if it reduces the two things that drain time and goodwill fastest:
-
splitting models into awkward chunks
-
cleaning up joins that beginners didn’t plan for
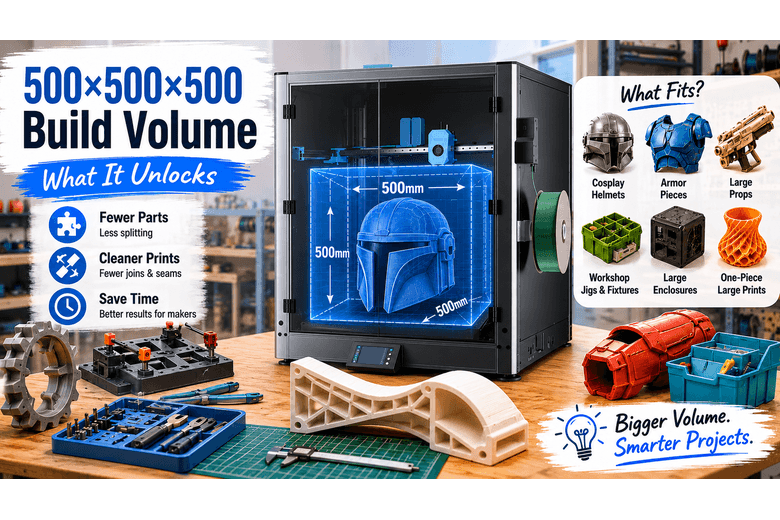
The official spec for the Sovol SV08 Max lists a 500×500×500 mm build volume (with 500×500×450 mm noted for an enclosure-kit variation). That puts it in the “large-format desktop FFF” class.
The real question for UK maker community leaders is simple:
-
What does a 500 mm cube actually unlock?
-
What still won’t fit—and what still shouldn’t be printed as one piece?
Key Takeaway: A 500×500×500 mm build volume is big enough to print many “normally multi-part” projects (helmets, large enclosures, jigs, fixtures) in fewer pieces—but large-format success still depends on first-layer consistency, warping control, and choosing when to split on purpose.
The SV08 Max build volume in plain terms
If you’re evaluating whether the SV08 Max build volume is the right fit for your community, focus on the size of your largest recurring projects, not the occasional once-a-year showpiece.
A printer’s build volume is the maximum X × Y × Z envelope it can print in one piece.
As a baseline definition, 3D Printer Build Volume: How Big Do You Actually Need? explains build volume as the maximum printable size, usually expressed in millimetres. In real use, you’ll often want a little margin for things like brims, skirts, bed-edge clearance, and slicer travel safety.
How to plan with a 500×500×500 3D printer (a true 500x500x500 3D printer class):
-
Treat 500 mm as your hard ceiling.
-
Treat ~480–490 mm as the “comfortable” ceiling when you want less drama.
-
Remember you’re not just fitting the part—you’re fitting the part plus your adhesion strategy.
What fits in the SV08 Max build volume (quick matrix)
This isn’t a promise that every file on the internet will fit. It’s a decision aid for a community lead who needs to answer: “Will this class of project usually be one piece on a 500mm machine?”
|
Category |
Often fits in one piece |
Usually fits (orientation matters) |
Usually needs splitting |
|---|---|---|---|
|
Cosplay |
Many helmets |
Chest plates, shin pieces |
Full torsos, oversized/winged helmets |
|
Props |
Large blasters, masks |
Medium-length swords/props |
Very long blades/staffs >500mm |
|
Workshop tools |
Big bins, organisers |
Jig plates, drill guides |
Extra-wide fixtures with long arms |
|
Electronics |
Control boxes, cases |
Rack-style panels, instrument housings |
Multi-bay cabinets and tall housings |
|
Education |
Large demo models |
Class sets (batch printing) |
Massive “wow” prints (full-scale) |
Cosplay: helmets and armour pieces you can often print without seams
For makerspaces, cosplay is where build volume becomes visible fast because it changes the default workflow:
-
Smaller printers force you to split almost everything.
-
A 500mm bed lets you choose where seams go instead of accepting wherever the slicer forces them.
Helmets
A common rough sizing signal from the cosplay community is that many helmet models target a key height measurement in the ~260–300 mm range for adult fits, before you add comfort allowance (padding, hair, ventilation). See the sizing discussion on the 405th forum: “Your number should be between 260mm and 300mm”.
What that means in practice:
-
Most “normal” helmets are in the easy zone.
-
You can often print cosplay helmet in one piece (or in two pieces with a removable back) with cleaner surfaces and fewer weak join lines.
-
For beginners, fewer seams is a real win because filler/sanding is where projects stall.
When you still split helmets on purpose (even if they fit):
-
you want the seam hidden along a natural ridge/panel line
-
you need a removable back plate for easier on/off
-
you want to print the dome in the best orientation for surface finish
Armour pieces
On a large-format printer, common “one piece” wins include:
-
forearm/gauntlet shells
-
shoulder bells
-
shin pieces
-
many chest/back plates (depending on body size and design)
But the bigger point isn’t “everything becomes one part.” It’s that you get more control over where complexity lands:
-
seams can move to less visible areas
-
parts can be thicker and more rigid without redesign
-
alignment features (pins/keys) become optional rather than mandatory
Pro Tip: For community printers, run a “test-fit print” policy: print a small ring/section around the tightest opening (helmet neck, chest entry) before committing to a 20+ hour full shell.
Large functional parts: jigs, fixtures, and workshop tooling
If your makerspace leans engineering/repair, large format 3D printing is often most valuable in the unglamorous category: tooling that improves repeatability.
Examples that often benefit from 500mm capacity:
-
large drill/route templates
-
fixture plates for glue-ups
-
assembly jigs for repeat builds
-
vacuum adapters and dust collection components with large cross-sections
-
wall-mounted organisers and bins that would otherwise be multi-part
Why community leaders care:
-
fewer joints = fewer failure points
-
fewer fasteners = less hardware hunting during workshops
-
large flat prints can replace plywood/acrylic for some jigs when you need quick iteration
The catch is that large, flat parts also expose large-format realities (first layers and warping) more brutally than small prints.
Enclosures and project boxes: where 500mm is genuinely liberating
For UK maker communities, “enclosures” often means:
-
electronics control boxes for robotics
-
instrument cases
-
battery boxes
-
organisers for community kits
-
panels and brackets for home-lab and workshop builds
A 500mm volume changes your default approach:
-
you can print taller single-piece housings
-
you can print front panels without slicing them into quadrants
-
you can design rounded corners and integrated cable guides without worrying about bed fit
If your community teaches beginners, this category is underrated: enclosures are approachable, useful, and they teach measurement and tolerance in a way “decor prints” don’t.
Batch printing: not just big things—more things
Build volume isn’t only about max size. It’s also about throughput.
A 500×500 bed can be used in two distinct modes:
-
One big part (high risk, high reward)
-
A well-spaced grid of smaller parts (often safer for a community printer)
For makerspaces, the second mode can be the smarter operational play:
-
you can print 12–30 identical workshop parts in one job
-
you can standardise spares (clips, knobs, brackets)
-
you reduce staff time spent “starting prints” all day
The trade-off is that a single failure can potentially ruin a larger batch. That’s where monitoring, filament condition, and conservative first-layer settings pay off.
What still doesn’t fit (and why you’ll still split models)
Even with a 500mm cube, there are categories that routinely exceed the envelope:
-
very long props (staffs, long swords, rifle-length items)
-
full-scale body armour torsos (depending on size/design)
-
large furniture components
-
big signage panels when you want one-piece rigidity
And sometimes you split not because you must, but because you should:
-
to reduce warping on huge flat areas
-
to orient parts for strength (layer direction matters)
-
to make sanding/finishing easier
-
to allow modular repairs (replace a damaged panel instead of reprinting the whole thing)
If you’re advising community members, the best message is:
-
big volume reduces splitting pain
-
it doesn’t remove the need for splitting skills
Large-format reality check: what makes or breaks a 500mm print
A final note for anyone excited about the headline number: big parts are only “easy” when your process is consistent. The SV08 Max build volume gives you options, but it also makes basic discipline (first layer, filament condition, sensible margins) more important, not less.
This is the part many large-format articles gloss over. For community leads, it’s the difference between a reliable tool and a constant support ticket.
First layer consistency across a huge bed
A 500mm plate is unforgiving. A tiny tilt or uneven heating you’d never notice on a 220mm printer can show up as:
-
adhesion problems on one edge
-
elephant’s foot in one corner
-
inconsistent squish across the bed
This is why features like fast full-bed levelling are often highlighted in large-format printers; it’s also why a makerspace should standardise a simple “bed prep + first layer” checklist.
Warping and shrinkage scale with footprint
The bigger the footprint, the more leverage the part has to peel itself off the bed.
-
Large flat prints are where warping becomes the default failure mode.
-
The fix isn’t only “more heat.” It’s brim strategy, enclosure strategy, and material selection.
Time and waste are amplified
On big prints, failure costs more:
-
2 hours lost is annoying
-
18 hours lost is a schedule disruption
For a shared-space printer, this changes your operational rules:
-
encourage test prints (critical cross-sections)
-
prefer “batch mode” for workshops unless the big part is the point
-
teach when to split for risk control, not only for fit
Space, noise, and shared-room practicality
Large-format printers are physically bigger, and they can be louder—especially at higher speeds.
For UK makerspaces, it’s worth planning:
-
where the printer lives (vibration isolation matters)
-
safe walkways around it
-
extraction/ventilation plans if you run higher-temp materials
⚠️ Warning: Large prints tempt people to “set and forget.” In a community environment, set expectations: long prints should be monitored, and members should have a plan for mid-print issues (filament tangles, partial clogs, adhesion loss).
A simple decision checklist for maker community leaders
If you’re deciding whether the SV08 Max build volume is useful for your community, the fastest method is to match it against your actual project mix.
Choose a 500mm-class printer if you often do:
If those projects keep coming up, a larger bed isn’t just a nice-to-have—it can be the difference between a project finishing in a weekend versus stalling at the seam-filling stage.
-
helmet/prop projects where seams kill momentum
-
functional workshop jigs and large fixtures
-
robotics/electronics cases bigger than a shoebox
-
batch workshop parts where “one start = many parts” saves staff time
Consider smaller volumes (or adding a second printer) if:
-
most prints are under 250mm and you mainly need redundancy/upright time
-
your community struggles with first-layer discipline already
-
you can’t dedicate space for a larger machine and safe access around it
Red flags to watch for (large-format regardless of brand)
-
“We’ll only print big stuff” (you’ll still do lots of small parts)
-
no plan for bed prep, nozzle checks, and filament storage
-
no policy for who owns a 30-hour print slot
Next steps
If you want to sanity-check fit for your community’s most common projects, start with the official 500mm envelope and compare it against a short list of “repeat offenders” in your makerspace: the biggest helmet file you use, your largest enclosure, and your widest jig plate.
For more context on the motion system that makes many large printers fast and stable, Sovol UK has a clear explainer: CoreXY 3D printer technology explained.
If you’re choosing between sizes and want a broader buying framework (including space, noise, and “what actually gets printed”), this internal guide is a useful cross-check: Large build volume 3D printers for UK homes.
And if you want a deeper, large-project-oriented overview for this specific machine, see: SV08 Max review for big projects.
Share:
PETG Filament Explained: When Should You Use It?
CoreXY vs Bed-Slinger (CoreXY vs Bed Slinger): Which 3D Printer Should You Buy in 2026?