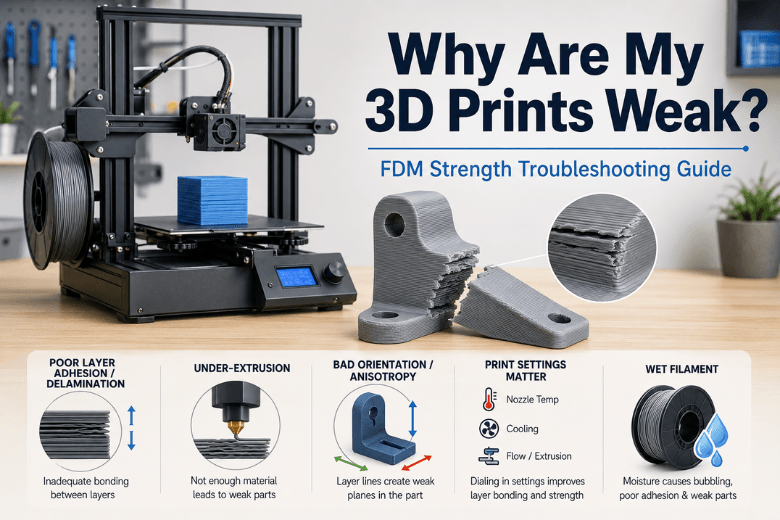
A part that looks fine but snaps in your hands is telling you something specific. In FDM/FFF printing, “weak” almost always means one of three things:
-
Poor bonding between layers (what people describe as 3D print weak layer adhesion or 3D print delamination)
-
Not enough plastic is being laid down (under-extrusion / under extrusion weak prints)
-
The part is being loaded in the weak direction (orientation + FDM anisotropy)
If you run printers for a UK makerspace or community group, the goal isn’t just fixing one print. It’s building a troubleshooting routine that beginners can follow and that keeps uptime high.
Key takeaways
-
If the part splits cleanly along layer lines, treat it as a bonding issue first: temperature, cooling, speed, drafts.
-
If the part crumbles, has thin walls, or shows gaps, treat it as under-extrusion until proven otherwise.
-
For strength, add walls/perimeters before you crank infill.
-
Moisture can be a strength problem (wet filament weak prints), not just surface roughness.
-
For community setups: standardise a baseline profile + a 15-minute test coupon.
Why are my 3D prints weak? Start with this 60-second diagnosis
|
What you see |
Most likely cause |
Best first change |
|---|---|---|
|
Snaps exactly along layer lines |
Poor layer bonding (layer adhesion / delamination) |
+5°C nozzle temp or less fan |
|
Thin walls, gaps, extruder clicking |
Under-extrusion |
Clear nozzle + check feed path |
|
Strong in one direction, weak in another |
Orientation / anisotropy |
Reorient for the load path |
|
Rough surface + popping + random weak spots |
Wet filament |
Dry the spool, then re-test |
The rule that saves the most time: change one variable at a time.
1) Weak layer adhesion (delamination): fix the “plastic welding” first
Layer separation is usually not mysterious. It’s “the layers cooled too fast” or “they were never hot enough to fuse.”
Prusa’s troubleshooting notes that splitting is commonly caused by incorrect temperature settings and excessive cooling/drafts, with material-specific guidance (e.g., ABS hates cold air and benefits from a stable, enclosed environment).Prusa’s “Layer separation and splitting FDM” guide (2026)
Temperature: stronger parts usually need warmer printing—up to a point
Printing too cold can produce clean-looking walls that are mechanically weak.
CNC Kitchen’s testing is a useful reminder that temperature has a sweet spot: raising temperature improves bonding until you reach an optimum, and pushing too far can reduce adhesion again.CNC Kitchen’s layer-adhesion temperature testing
What to do:
-
Increase nozzle temperature in 5°C steps
-
Re-test a small strength coupon
-
Stop when bonding is strong and you’re not introducing new defects you can’t tolerate (sagging, excessive stringing, fumes)
Cooling: don’t freeze layers before they’ve bonded
If you’re chasing strength, aggressive part cooling can work against you—especially in a cool room or a drafty workshop.
What to do:
-
Keep fan low/no fan on the first layers
-
If you’re splitting, test a lower fan setting for the whole print
-
Shield the printer from obvious drafts
Pro Tip: A “good” profile can start failing when ambient temperature drops. In shared UK spaces, this is common in winter.
2) Under-extrusion: the hidden reason “100% infill” still breaks
If the printer is under-extruding, the part is literally missing material. That creates weak walls and weak internal bonds.
Under-extrusion is a common reason prints are fragile even at high infill: gaps and thin walls mean the part is literally missing plastic.
Do the quick hardware checks first
-
Feed path: spool tangles and drag create intermittent starvation
-
Nozzle: partial clog = weak prints
-
Extruder gears: debris or wear = slipping
Then confirm the slicer isn’t lying about extrusion
A reliable workflow is:
-
confirm filament diameter is correctly set
-
calibrate flow/extrusion multiplier with a simple 2-wall test
-
only then chase speed/retraction tweaks
⚠️ Warning: Don’t try to “solve” this by crushing the first layer. A nozzle that’s too close can cause under-extrusion.
3) Orientation: FDM is anisotropic (and it matters)
FDM parts are not equally strong in all directions.
Hubs explains that FDM prints are typically much stronger in the XY plane than in Z, and notes a commonly cited rule of thumb: tensile strength can be 4–5× higher in XY than Z.Hubs’ explanation of FDM anisotropy and orientation
Practical rule:
-
If your part is being pulled apart, avoid orienting it so the load tries to peel layers apart.
-
If you can’t reorient, reinforce design: thicker sections, fillets, and more continuous material.
4) Walls vs infill: your fastest “strength per minute” lever
“Increase infill” is popular advice, but it’s often the slowest way to get meaningful strength.
Try this order instead:
-
Fix bonding (temp/cooling/speed)
-
Fix under-extrusion (hardware + flow)
-
Reorient for the load path
-
Add walls/perimeters
-
Then adjust infill if you still need stiffness or crush resistance
If you’re building a shared baseline profile, start with more walls and moderate infill, then validate with a simple test coupon.
5) Moisture: why wet filament causes weak prints
Moisture doesn’t just make prints ugly—it can make them weaker.
Prusa lists common moisture symptoms including stringing, low layer adhesion, blobs, bubbling, and smoke during extrusion, and recommends storage-first habits plus material-appropriate drying temperatures/times.Prusa’s filament drying guide (2026)
A safe, simple cheat sheet (from Prusa’s table):
-
PLA: 45°C for 6 hours
-
PETG: 55°C for 6 hours
If you want a practical, UK-humidity-friendly checklist for beginners, Sovol’s calibration guide summarises wet-filament signs and conservative drying ranges in one place.Sovol’s calibration guide (incl. wet filament symptoms)
The bigger win in community spaces is prevention: sealed storage, labels, and a clear “who owns this open spool?” policy.
6) Material choice: when PLA isn’t the right default
If you’re printing functional parts that get squeezed, flexed, or dropped, PLA can be the wrong material—especially if your settings are tuned for surface finish over bonding.
In many community environments, PETG is a solid “default functional” material because it’s tougher than PLA without requiring the same enclosure discipline as ABS/ASA.
Next steps (low-pressure)
If you want a single internal reference to standardise for your group, start with Sovol’s calibration guide (including wet filament symptoms and flow calibration). It’s a good basis for a shared checklist.
FAQ
Why does increasing infill not fix my weak prints?
Because many failures are caused by poor bonding or under-extrusion. Infill can’t compensate for layers that aren’t fused or walls that are missing material.
My print splits along layer lines—what should I change first?
Increase bonding first: raise nozzle temperature slightly and reduce excessive cooling/drafts.
How do I know if it’s under-extrusion?
Look for thin walls, gaps, clicking, inconsistent extrusion, or a print that feels “under-filled” even with high infill.
Does orientation really matter that much?
Yes—FDM anisotropy means you should orient parts so the primary load runs along layers where possible.
What’s the safest way to dry filament?
Use controlled temperatures and prioritise storage to avoid repeated drying.
Share:
How to get cleaner 3D prints without slowing everything down
Why your 3D print is failing: common causes and fixes