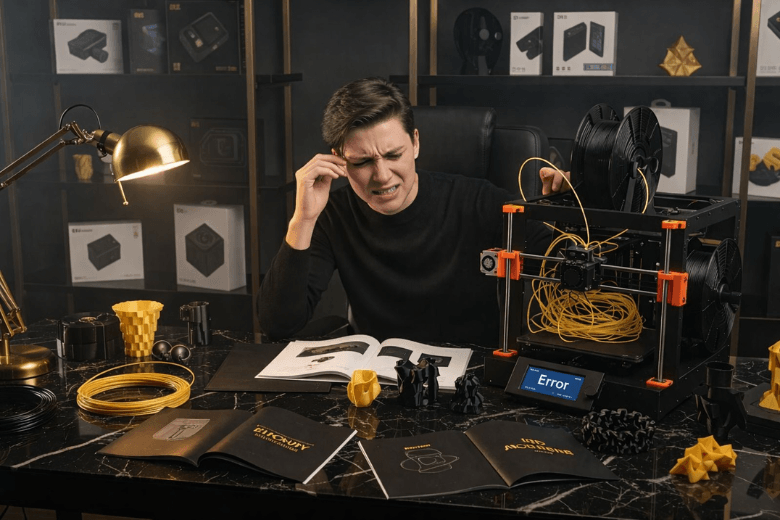
You may find your first 3D printer overwhelming. Many users struggle with setup steps, especially when levelling the plate or managing resin vats. If you own your first 3D printer, you might hear grinding noises from hardened resin or see prints sag and 3D printers fail to stick. Adhesion issues, confusing technical fixes, and repeated troubleshooting can make the first 3D printer experience frustrating. Many beginners report that their first 3D printer often leads to delays and disappointment. When your first 3D printer fails, you need clear 3D printing advice for beginners. You can overcome these challenges even if your first 3D printer does not succeed at first.
Key Takeaways
-
Setup your 3D printer carefully. Follow the manufacturer's instructions to avoid common mistakes like improper bed levelling and loose components.
-
Regularly calibrate your printer. Keep a log of adjustments to ensure consistent print quality and prevent failures.
-
Seek guidance from online communities and resources. Structured support helps you navigate challenges and improve your skills.
-
Maintain your printer with routine checks. Clean the build surface and inspect parts to prevent clogs and ensure smooth operation.
-
Use high-quality filament. Reliable materials improve print success and reduce issues like warping and clogs.
Why 3D Printers Fail Beginners
Setup Complexity
You encounter setup complexity as soon as you unbox your first machine. Many users find the initial steps confusing and time-consuming. You must assemble components, connect cables, and adjust mechanical parts. These tasks often feel overwhelming, especially if you have no prior experience with machinery.
Common problems during setup include:
-
Wobbling print beds that result from improper mechanical adjustments.
-
Loose extruders that cause excessive movement and poor print quality.
-
Incorrect belt tension, which leads to motor slipping and failed prints.
-
Improper bed levelling, which is essential for adhesion and overall print success.
-
Forgetting to disable stepper motors before manual adjustments, risking electrical damage.
You can see these problematic setup steps in the table below:
|
Problematic Setup Step |
Description |
|---|---|
|
Wobbling Print Bed |
Often caused by improper mechanical adjustments. |
|
Loose Extruder |
Can lead to excessive movement and poor print quality. |
|
Incorrect Belt Tension |
If too loose, it can cause motor slipping, negatively impacting prints. |
|
Improper Bed Leveling |
Essential for print adhesion and quality; requires careful manual adjustments. |
|
Disabling Stepper Motors Before Adjusting |
Prevents electrical spikes that can damage the printer during manual adjustments. |
You must also manage cable routing and component reliability. Many beginners report frustration with cable management right out of the box. Faulty strain gauges and unreliable parts can add to your difficulties. These setup challenges explain why 3d printers fail for so many new users.
Calibration Challenges
Calibration stands as one of the most critical steps in achieving successful prints. You need to understand and perform several calibration tasks, such as marking filament, extruding measured amounts, and adjusting extruder steps. These actions ensure your printer delivers the right amount of material at the correct speed.
You may face the following calibration issues:
-
Poor first-layer adhesion if the nozzle sits too high, which prevents proper bonding and leads to peeling or failed prints.
-
A Z-offset set too low, causing the nozzle to drag through the filament, resulting in scratches or clogs.
-
Inconsistent extrusion, which creates gaps, blobs, or misaligned layers, even when the first layer appears acceptable.
Regular calibration and maintenance keep your printer within the required tolerances. This directly impacts your print quality and success rates. Many users cite calibration as a major reason why 3d printers fail. If you skip or rush these steps, you increase the risk of 3d printer failure and common beginner 3d printing mistakes.
Tip: Keep a simple calibration log. Record each adjustment and result. This habit helps you track progress and spot recurring issues.
Lack Of Guidance
You may find yourself lost without clear instructions. Many beginners struggle because they lack structured guidance. The 3d printing process involves many steps, from setup to advanced calibration. Without detailed resources, you may not know how to select the right filament or troubleshoot problems.
You can benefit from resources that provide step-by-step instructions. These guides cover everything from initial setup to regular maintenance. When you follow a structured approach, you avoid many common pitfalls. However, without guidance, 3d printers fail more often for beginners.
You should seek out communities, forums, and official documentation. These sources offer valuable advice and support. Regular maintenance and a methodical approach help you avoid unnecessary 3d printing troubleshooting.
Note: Most users experience setbacks at first. With patience and the right guidance, you can overcome these challenges and achieve consistent results.
Bed Levelling & Setup
Bed Levelling Issues
You will often encounter problems with bed leveling during your first prints. A clean print bed is essential, as oils from your fingers can prevent proper adhesion. If the bed is not level, you may notice prints detaching or failing to stick on one side. Consistent distance between the nozzle and the bed is crucial for a successful first layer. Even if your printer features automatic leveling, manual checks remain important. You should regularly inspect the bed and ensure it remains flat and free from debris.
Tip: Always clean the print bed before starting a new print to improve adhesion and reduce failures.
To achieve a properly levelled bed, follow these steps:
-
Clean both the nozzle and the build plate thoroughly.
-
Home the printer to reset its position.
-
Adjust the bed knobs to a halfway point.
-
Use a piece of standard printing paper to check the gap at each corner.
-
Slide the paper under the nozzle and adjust until you feel slight resistance.
-
Print a test layer to confirm the results.
-
Repeat the process regularly, especially after moving the printer or changing components.
Z-Offset Mistakes
Setting the correct Z-offset is vital for print quality. If the nozzle sits too high, the filament will not bond to the bed, causing peeling and failed prints. If the nozzle is too low, it may drag through the filament, leading to clogs or scratches on the bed. You should adjust the Z-offset carefully and use test prints to verify the first layer’s appearance. Small changes can make a significant difference in adhesion and overall print success.
Assembly Errors
Assembly mistakes can cause persistent print failures. The table below outlines common errors and how you can prevent them:
|
Assembly Error |
Prevention Method |
|---|---|
|
Elephant Foot Effect |
Align the printing plate correctly and maintain proper nozzle distance. Run test prints to check calibration. |
|
Temperature Issues |
Set tray and extruder temperatures according to manufacturer guidelines. |
|
Rafting |
Use a raft to create a buffer layer, reducing first-layer deformation. |
|
3D Modelling Adjustments |
Add a slight bevel to the model’s base or use software settings to counteract the elephant foot effect. |
You can avoid most assembly errors by following the manufacturer’s instructions and performing regular checks. Careful setup and attention to detail will help you achieve reliable prints from the start.
Materials & Environment
Filament Quality
You will notice that filament quality plays a crucial role in your printing success. High-quality filament ensures consistent extrusion, strong bed adhesion, and minimal warping. These factors directly affect your print reliability. When you use premium filament, you reduce the risk of failed prints and improve the overall appearance of your models. Beginners often struggle to adjust printer settings to compensate for poor filament. You benefit from using reliable brands because they offer stable flow and predictable results. Low-quality filament can introduce problems such as inconsistent diameter, impurities, or moisture absorption, which lead to clogs and uneven layers. You should always inspect your filament for uniformity and choose reputable suppliers.
Tip: Start with a well-reviewed PLA filament. It offers easy handling and fewer complications for new users.
Storage & Humidity
You must store your filament correctly to maintain its quality. Exposure to humidity can cause the filament to absorb moisture, leading to bubbles, stringing, and weak prints. You should keep your spools in airtight containers with desiccant packs. This simple step prevents water absorption and extends the life of your material. If you notice popping sounds or steam during printing, your filament may have absorbed moisture. Drying the filament before use restores its performance and reduces print failures.
|
Parameter |
|
|---|---|
|
Relative Humidity |
45-55% |
|
Temperature |
Stable conditions |
You should monitor your workspace to keep humidity within the recommended range. This practice ensures your filament remains in optimal condition.
Temperature Control
You need to maintain a stable environment for your 3D printer. Fluctuations in room temperature can affect print quality and cause warping or layer separation. Place your printer in a space with minimal drafts and consistent temperatures. Avoid direct sunlight or cold spots near windows. If you print with advanced materials, consider using an enclosure to regulate the temperature around your printer. Consistent conditions help you achieve reliable results and reduce the number of failed prints.
Note: A controlled environment supports both your printer and your filament, leading to better outcomes every time.
Print Quality Problems
You will encounter print quality problems as you begin your 3D printing journey. These issues often stem from incorrect slicer settings, poor model preparation, and extrusion problems. Addressing these factors improves your print quality and reduces the risk of failing prints.
Slicer Settings
You must pay close attention to slicer settings to achieve consistent print quality. Selecting the correct printer model ensures your software communicates accurately with your hardware. Adjusting resin settings is crucial for successful prints, especially when you switch materials. Environmental factors, such as temperature, also impact print quality. You should always check these settings before starting a new project. Many beginners overlook these steps, leading to common print quality issues like warping, shifting, and over-extrusion.
Tip: Save your slicer profiles for different materials. This practice streamlines quality control and minimises errors.
Model Preparation
You need to prepare your models carefully to avoid common defects. Check for errors in the 3D file before slicing. Ensure the model sits flat on the build plate and does not have unsupported overhangs. Use the slicing software’s repair tools to fix mesh problems. Proper orientation and support placement improve adhesion and reduce warping. Quality control at this stage prevents failing prints and saves time.
-
Inspect the model for holes or non-manifold edges.
-
Add supports where necessary to prevent sagging.
-
Orient the model to minimise the need for supports and improve surface quality.
Layer Adhesion & Under-Extrusion
You will often face layer adhesion and under-extrusion problems. These issues can ruin print quality and lead to failed prints. Under-extrusion may result from a clogged nozzle or a blockage in the filament path. Incorrect filament diameter settings in your software also cause under-extrusion. Adjust the extrusion multiplier in small increments to correct the amount of extruded material. Increasing the printing temperature improves adhesion, as hotter plastic bonds better. Optimise layer height and process filament at the recommended temperature to prevent adhesion problems.
To troubleshoot warping and under-extrusion, follow these steps:
-
Ensure good adhesion of the first layer by levelling the bed and using adhesive aids.
-
Provide effective cooling by increasing fan settings or using an external fan.
-
Lower the print or bed temperature in small increments to improve cooling.
-
Print at a slower speed to allow each layer to cool before the next one.
Consistent quality control and regular troubleshooting help you overcome common print quality problems and achieve reliable results.
Maintenance For Success
You achieve consistent print success by making maintenance a regular habit. Many beginners overlook this step, yet it remains essential for protecting print quality and extending the life of your machine. Consistent maintenance and clear operating rules help you prevent 3d printer issues and avoid reliability problems that often arise from neglect.
Routine Checks
You should perform routine checks before every print. These checks help you spot problems early and avoid a clogged nozzle or unexpected clog. The table below outlines the most important checks and their impact on your printer’s success:
|
Routine Check |
Importance |
|---|---|
|
Clean Build Surface |
Essential for strong bed adhesion and high-quality prints. |
|
Stepper Motor Checks |
Helps identify issues before they affect prints, ensuring smooth operation. |
|
Axis Movement Inspection |
Ensures precise layer placement and extends printer life. |
|
Electrical Safety Checks |
Protects against hazards and maintains equipment reliability. |
You should also regularly clean the nozzle and extruder, lubricate moving parts, and check filament quality. These small steps help you avoid a clog and keep your printer running smoothly.
Cleaning & Replacing Parts
You maintain optimal performance by cleaning and replacing parts at set intervals. After each print, clean the build plate and remove debris to prevent a clog from forming. Every three months, lubricate lead screws and check belt tension. Every six months, inspect purge rubbers and lubricate Z shafts. Annually, replace air filters and inspect Bowden tubes. The table below provides a simple maintenance checklist for beginners:
|
Maintenance Task |
Frequency |
Description |
|---|---|---|
|
Clean build plate & remove debris |
After each print |
Immediate care to maintain print quality and prevent failures. |
|
Lubricate lead screws, check belts |
Every 3 months |
Mechanical health maintenance to ensure smooth operation. |
|
Check purge rubbers, lubricate Z shafts |
Every 6 months |
Component care to extend part life and maintain performance. |
|
Replace air filters, inspect Bowden tubes |
Annually |
Deep maintenance to ensure air quality and tubing integrity. |
Preventative Tips
You extend your printer’s lifespan by following preventative tips. Store filament spools in airtight containers with desiccant to avoid moisture, which can cause a clog. After every print, clean the build surface to remove residue and fingerprints. Each week, inspect belt tension and the tightness of eccentric nuts. Every month, tighten screws and bolts, and clear dust from moving parts. These habits help you avoid a clog and ensure ongoing success.
Tip: Use a maintenance checklist to track your routine. This simple tool helps you remember each step and maintain consistent print success. 📝
Ignoring storage and maintenance after setup can lead to reliability issues and frequent clog. By following these steps, you prevent 3d printer issues and achieve long-term success with your 3D printer.
You face common challenges when starting with 3D printing, such as setup complexity, calibration, and lack of guidance. These obstacles are manageable with the right support and resources.
-
Many users overcome barriers through access to technical help and a supportive community.
-
Regular practice and patience lead to steady improvement and increased confidence.
You can find free guides and structured courses to help you troubleshoot and learn.
|
Resource |
Description |
|---|---|
|
Free 3D Printing Resources & Guides |
Excellent starting point for hands-on learning and troubleshooting. |
Stay curious and persistent—your skills will grow with each print. 🚀
FAQ
What should you do if your print does not stick to the bed?
You should clean the bed thoroughly and check the bed levelling. Use a glue stick or painter’s tape for extra adhesion. Adjust the first layer height if needed.
How often should you calibrate your 3D printer?
You should calibrate your printer before every major project or after moving the machine. Regular calibration ensures consistent print quality and reduces the risk of failed prints.
Which filament is best for beginners?
Tip: Start with PLA filament.
PLA offers easy handling, low warping, and reliable results. You will find it ideal for learning and troubleshooting.
Why does your printer make clicking or grinding noises?
|
Noise Type |
Likely Cause |
Solution |
|---|---|---|
|
Clicking |
Filament jammed |
Check for blockages |
|
Grinding |
Loose belts/gears |
Tighten and lubricate |
You should stop printing and inspect the machine immediately.
Where can you find reliable 3D printing help?
You can join online forums, read official documentation, or watch video tutorials. Many manufacturers offer support communities. These resources provide step-by-step guidance and troubleshooting tips.
Share:
Sovol SV06 ACE: High-Speed Printing on a Budget
Why More Makers Are Switching to CoreXY 3D Printers