If you’re running (or advising) a makerspace, a school lab, or a busy community print farm, the question isn’t “can I print PLA and PETG without a dryer?”—you can.
The real question is: does a dryer reduce enough failed prints and troubleshooting time to justify the cost and the extra box on the bench?
Key takeaways
-
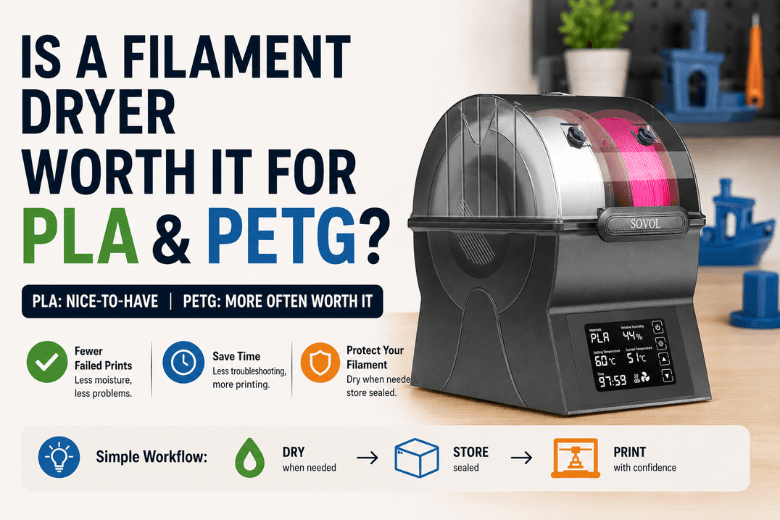
For most PLA: a filament dryer is nice-to-have, not mandatory—unless your spools sit out for days, your room regularly climbs above ~55–60% RH, or you’re seeing classic “wet filament” symptoms.
-
For PETG: a dryer is more often worth it, because PETG tends to show moisture issues sooner (especially stringing and inconsistent extrusion).
-
A dryer isn’t a magic fix for every ugly print. If your filament is already dry, a dryer won’t solve poor first layers, bad Z-offset, a dirty nozzle, or over-aggressive retraction.
-
The highest-ROI workflow for shared spaces is usually: dry when needed → store sealed with desiccant → print from a dry box (optional).
Key Takeaway: If your goal is fewer support tickets and less “why did this start stringing?” drama, PETG-heavy communities benefit from a dryer earlier than PLA-heavy ones.
Filament dry box vs dryer (quick comparison)
|
Option |
What it does well |
Where it fails |
Who it fits best |
|---|---|---|---|
|
Airtight box + desiccant |
Keeps already-dry spools dry; cheap; scalable |
Doesn’t actively dry wet filament (slow/limited) |
Low-volume PLA users; storage-first setups |
|
Filament dryer (heated + controlled) |
Actively removes moisture; consistent results; predictable SOP |
Costs more; takes bench space; still needs storage after drying |
PETG users; makerspaces; anyone chasing uptime |
|
Food dehydrator (adapted) |
Often good heat + airflow per £; can handle multiple spools |
DIY effort; temperature validation needed |
Technical communities that like DIY |
|
Oven (last resort) |
Can work if low, stable temp is truly controlled |
Temp swings/overshoot risk; easy to ruin PLA |
Only if you can verify temperature and monitor closely |
What moisture actually does to PLA and PETG
Moisture doesn’t just “make filament old.” When damp filament hits hot-end temperatures, trapped water turns to steam. That shows up as:
-
popping / hissing sounds
-
bubbles or pitting in the extrusion
-
rough or foamy surfaces
-
stringing and oozing that suddenly appear “for no reason”
-
inconsistent extrusion (which can look like under-extrusion)
Polymaker’s troubleshooting guide on wet filament symptoms summarises these failure modes well, and BCN3D’s support docs also connect humidity to issues like stringing and bubbles in humidity-affected filament printing.
PLA vs PETG: which one “needs” drying more?
In practice, PETG tends to punish sloppy storage faster than PLA. If you run PETG in a shared space, “wet filament” is one of the most common root causes when stringing suddenly spikes.
PLA can absolutely get damp too—especially when it’s left out for long periods—but many UK setups can run PLA just fine with good sealed storage and a basic “don’t leave it on the printer for a week” rule.
Filament dryer worth it? A decision framework for PLA and PETG
Here’s the decision framework that works in the real world.
A dryer is usually worth it for PLA if…
-
Spools live on open shelves and get used on and off (rather than being sealed between sessions).
-
You’re seeing wet-filament symptoms (popping, bubbles, sudden stringing) and you’ve ruled out obvious printer causes.
-
Your space has high or variable humidity (common in UK workshops, garages, and community rooms), and you can’t realistically keep storage boxes under control.
-
You care more about predictability than “minimum spend.” (In a makerspace, predictability is a cost saver.)
A dryer is usually worth it for PETG if…
-
PETG is a standard material in your community and you’re tired of retraction/temperature “tuning spirals” that are really moisture problems.
-
You want a repeatable policy: dry PETG before first use (or after X days out), then store sealed.
-
You want fewer failed prints during workshops and less mentor time spent diagnosing stringing.
Sovol’s UK guide to PETG moisture and stringing leans into the same practical reality: if PETG starts stringing unexpectedly, treat moisture as a first check.
A dryer is not worth it yet if…
-
You mostly print PLA, finish a spool quickly, and store everything sealed with fresh desiccant.
-
You rarely see wet-filament symptoms.
-
Your pain point is printer setup (first layer, calibration, bed contamination) rather than material handling.
What to look for in a filament dryer (without getting sold to)
For PLA and PETG, the “worth it” features are boring—but they’re the ones that reduce failures:
-
Stable low-temperature control (PLA is easy to soften if you overshoot)
-
Even heating + airflow (hot air moving beats “warm box”)
-
A way to verify humidity or dryness (even a basic hygrometer window is useful)
-
Ability to print while drying (nice for workflow, not required)
-
Enough capacity for how you actually work (one spool vs two-spool throughput)
If you’re standardising a makerspace workflow, prioritize repeatability over maximum temperature. PLA/PETG don’t need extreme temps; they need consistency.
Safe baseline drying temperatures (PLA and PETG)
Use manufacturer-grade guidance as your baseline, then adjust based on symptoms.
Prusa’s knowledge base table recommends the following PLA drying temperature and PETG drying temperature baselines:
-
PLA: 45°C for 6 hours
-
PETG: 55°C for 6 hours
Prusa also calls out a practical risk: many home ovens can’t hold low temperatures accurately, so it’s easy to overshoot and damage low-temp materials like PLA.
⚠️ Warning: If you use an oven or any DIY heat source, verify the real temperature with an external thermometer. Overshoot is how people accidentally soften PLA and fuse a spool into a single plastic brick.
A makerspace-friendly SOP (the part that actually saves time)
If you lead a community, the most expensive part of moisture isn’t the filament—it’s the support load.
A simple SOP that works:
1) Classify filaments into two bins
-
“Dry by default”: PETG and anything that has shown stringing/roughness problems
-
“Store carefully”: PLA that has been stable in your space
2) Add a label and a rule
-
Put a small tag on each spool: Last dried: date
-
Rule of thumb:
-
If a spool has been out for a week in a shared space, dry it before a workshop.
-
If you hear popping or see bubbles, dry it before changing slicer settings.
-
3) Make storage visible and measurable
-
Use airtight boxes with desiccant + a cheap hygrometer.
-
Aim to keep the storage box in a “dry enough” range (many shops target below ~20–30% RH inside the box) rather than guessing.
-
If your room often sits above ~55–60% RH, sealed storage becomes less optional.
Ruuvi’s guide to managing humidity in filament storage is a good primer on measuring rather than guessing.
FAQ
Do you need a filament dryer for PLA?
Not always. If PLA is stored sealed with desiccant and prints cleanly (no popping, bubbles, or sudden stringing), a dryer won’t add much. In shared or humid environments where spools sit out, a dryer can improve consistency.
If you’re not sure whether moisture is the issue, Sovol’s guide on how to identify wet filament problems is a quick “how to tell if filament is wet” checklist you can share with members.
Do you need a filament dryer for PETG?
More often, yes—especially if PETG is used regularly and you want predictable results. Moisture is a common hidden cause behind PETG stringing and messy surfaces.
Is a dry box enough, or do you need heat?
A dry box is excellent for keeping filament dry. Heat (a dryer/dehydrator) is what actively removes moisture once it’s already absorbed. Many setups use both: dry when needed, then store sealed.
Can you dry filament in a kitchen oven?
It can work, but it’s risky because ovens often swing above the set temperature at the low end. Prusa specifically calls out oven accuracy concerns in their drying filament guidance. If you do it, verify temperature independently and monitor.
Next steps (for Sovol UK readers)
If you want to standardise a “dry → store → print” workflow, start by choosing one method your community can follow consistently. If you decide a dedicated dryer makes sense for your space, you can compare options in Sovol’s filament dryer collection and match capacity to your actual spool throughput.
If you want a quick refresher on the symptoms (so mentors diagnose faster), Polymaker’s wet filament troubleshooting guide is a solid reference.
Share:
When Filament Becomes Freedom: A Maker’s 3D Printed Mobility Trainer Built with Sovol Gradient Green PETG
The rise of home 3D printing: why makers want more space, speed and control