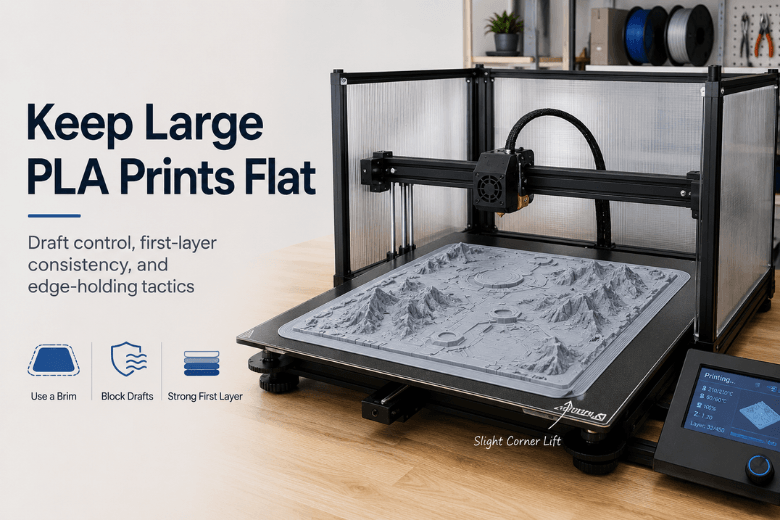
Large PLA props and terrain pieces fail in a very specific way: the first layer looks fine, the print runs for hours… then one edge lifts, the part rocks slightly, and everything that comes after is fighting a twisted foundation.
If you’re printing on an open-frame printer in a drafty room (typical makerspace reality), the goal isn’t “perfect settings.” It’s a setup that’s stable across the whole build plate, for the whole print, even when the room temperature and airflow aren’t perfectly controlled.
This guide is written for consideration-stage readers: it compares approaches, explains trade-offs, and gives you a repeatable order of operations.
Keep large 3D prints flat: a quick decision table (start here)
|
What you’re seeing |
Most likely cause |
Best first move |
|---|---|---|
|
One corner lifts early (first 10–30 layers) |
Draft hitting one side, or Z-offset/level inconsistency on that corner |
Block drafts first; then re-check Z-offset/mesh |
|
Both front corners lift |
Bed too cool at edges, first layer not “wetting” the plate, fan too aggressive |
Slow first layer + reduce early cooling + add a brim |
|
Edges lift mid-print (after it looked fine) |
Cooling ramp too strong, or long edges shrinking unevenly as they cool |
Reduce fan for long flat sections; add draft shield |
|
Part stays stuck but ends up slightly “banana” |
Thermal gradients + geometry that wants to curl |
Change orientation/split part; add ribs/sacrificial feet |
|
Print rocks on the plate after a few hours |
A lifted edge is now acting like a lever |
Stop and fix root cause—don’t “push through” |
Key Takeaway: If you’re in a drafty room, you’ll usually get more reliability from reducing airflow than from endlessly adding stronger adhesives.
1) Control drafts without overheating PLA
Warping and corner lift are driven by uneven cooling and shrinkage stress. If one side of the print cools faster than the other, the edges contract unevenly and the corners become natural peel points (this “thermal gradient” framing is well explained in The Virtual Foundry’s guide to corner curling and thermal stress (updated 2026)).
For PLA, you typically don’t need (or want) a sealed hot chamber. What you want is airflow consistency.
Practical options (from least to most intrusive):
-
Move the printer away from doors, windows, extractor fans, and HVAC vents.
-
Add a three-sided draft shield (foamboard/cardboard) around the printer’s sides and rear, leaving the front/top open.
-
If you use an enclosure, treat it as a draft blocker: keep a door cracked or add venting so PLA doesn’t soften.
Failure mode to watch: you “fix” lifting but start seeing soft corners, droopy overhangs, or mushy details—signs your enclosure strategy is trapping too much heat for PLA.
2) Make the first layer boringly repeatable
Most “big print warping” is actually “big print first layer inconsistency.” A large footprint simply exposes every small issue: a slightly greasy patch, a slightly high corner, a slightly off Z-offset.
A good baseline workflow:
Clean the build surface like it matters
Even a thin film of oil changes adhesion.
If you’re running a makerspace, you’ll get better uptime if you standardise the fix order (so every member tries the same steps first) rather than letting every printer develop its own folklore.
(External framing: Wevolver’s overview of 3D print warping causes and fixes (2025).)
Verify the Z-offset across the whole plate
For makerspace leaders, the key is consistency:
-
Check centre and the corners.
-
If your printer supports mesh levelling, confirm the mesh is current.
When you want a Sovol-specific checklist to standardise across machines, use 3D printer first layer not sticking: a practical fix order that actual printers follow and How to Get a Perfect First Layer on an FDM 3D Printer.
Slow down and “widen” the first layer
For large props, speed on layer 1 is rarely worth it.
-
Slower first layer = more time for the filament to bond.
-
A slightly wider first layer line can increase contact area.
Failure mode to watch: if you overdo squish/widening, you’ll get elephant foot and sometimes worse dimensional accuracy. Fix by backing off Z-offset slightly or enabling elephant-foot compensation.
3) Brim vs tabs vs raft: which edge-holding tactic should you use?
This is where most people waste time. They jump straight to “use a raft” when a brim or corner tabs would have solved the problem with less cleanup.
Here’s the clean comparison:
Skirt (priming tool, not a hold-down tool)
A skirt is mainly there to prime extrusion and reveal early problems. It doesn’t meaningfully prevent lifting.
Brim (default for large PLA props)
A brim attaches to the edge of the model and increases the “hold-down ring” area. It’s specifically used to hold down edges to prevent warping, and it’s usually faster and uses less filament than a raft (as described in Simplify3D’s explanation of rafts vs skirts vs brims).
When to pick a brim:
-
Long straight edges
-
Shallow contact features that tend to peel
-
You want minimal post-processing vs a raft
Mouse ears / corner tabs (when corners are the only issue)
If only corners lift, tabs can be more surgical than a huge brim:
-
Add small circles/tabs at corners
-
You’re increasing local adhesion only where stress concentrates
Raft (last resort for PLA, useful for bad plates)
A raft creates a sacrificial foundation under the whole part. It can help when:
-
Your bed surface is damaged/uneven
-
You need a “process window widening” band-aid for a high-stakes print
But it costs:
-
More time
-
More filament
-
More bottom-surface cleanup
Pro Tip: If you can’t make a brim work, treat that as a signal: you’re probably fighting drafts, a dirty plate, or an inconsistent Z-offset—not a “need more adhesion” problem.
4) Cooling strategy: keep the first layers calm, then ramp intentionally
For large flat sections, aggressive cooling can create the exact thermal gradient that causes lifting.
A practical approach:
-
Keep fan low/off for the first few layers, then ramp.
-
Avoid sudden jumps to 100% fan on large flat footprints.
This matches the general “uneven cooling → warping” framing in Wevolver’s warping guide (2025).
Failure mode to watch: if you reduce cooling too much, overhangs and small details degrade. The solution is usually to ramp later—or use adaptive cooling—rather than blasting the fan from layer 2.
5) Geometry tactics for terrain, cosplay, and props
The fastest path to “flat” is often not a slicer tweak—it’s a geometry decision.
Split the model where it wants to curl
Large props often have long, thin edges. Splitting lets each segment shrink with less leverage.
Add sacrificial feet or ribs
For models where the underside isn’t visible:
-
Add small “feet” that increase edge contact
-
Add a hidden rib to increase stiffness
Round external corners when you can
Sharp corners concentrate stress. A small fillet can reduce the tendency to peel.
6) Build a makerspace SOP for repeatability
If you’re responsible for uptime across multiple printers and users, standardise the checks:
-
Plate cleaning routine (what cleaner, how often)
-
Levelling/mesh cadence
-
First-layer test pattern (one file, used on every printer)
-
Default brim/tab policy for large PLA props
For internal guidance you can share with members, How to Fix Warping in 3D Printing for Reliable Results pairs well with the first-layer links above.
FAQ
Do I need an enclosure for large PLA prints?
Not usually. In a drafty room, a draft shield often solves the real problem without the downsides of heating PLA too much.
What bed temperature is “right” for large PLA parts?
There isn’t one universal number—plate material, ambient temperature, and airflow all change the answer. Use manufacturer guidance as a start, then tune for stability. Sovol’s warping and bed-adhesion guides (linked above) are a good baseline.
Brim or raft for a huge terrain base?
Start with a brim. Use a raft when your bed surface or levelling consistency is suspect, or when you need a wider process window and accept extra cleanup.
Next steps (a practical checklist)
If you want a quick, repeatable flow for your next big PLA prop:
-
Block the draft (even a simple shield).
-
Clean the plate.
-
Re-check Z-offset/mesh.
-
Slow the first layer + keep early cooling gentle.
-
Use a brim or corner tabs.
And if you’re running Sovol machines in your makerspace, it’s worth pinning these two references for new members:
-
3D printer first layer not sticking: a practical fix order that actual printers follow
-
How to Get a Perfect First Layer on an FDM 3D Printer
-
How to Fix Warping in 3D Printing for Reliable Results
(If you want the external “why” behind the recommendations above: Wevolver’s and The Virtual Foundry’s guides are solid starting points.)
Share:
How to Stop Large 3D Prints from Warping
PLA warping after cooling: why prints bend (and what to change)