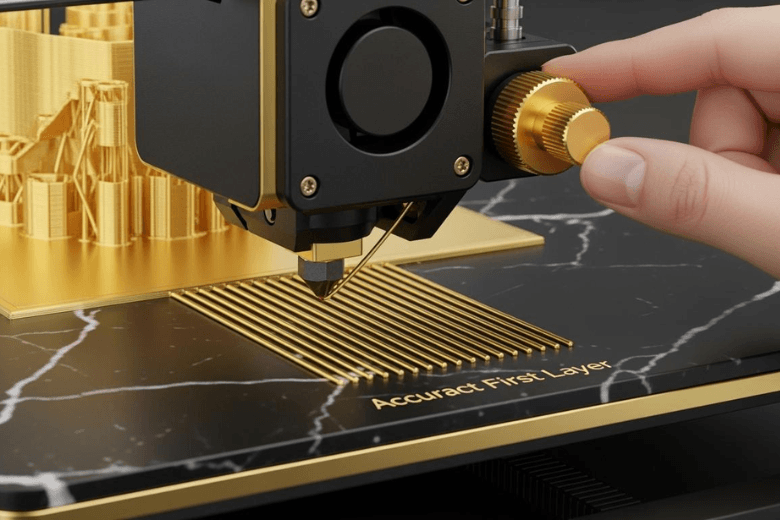
You must ensure the first layer adheres properly to achieve flawless 3D prints. Poor adhesion leads to layer delamination, gaps, and weak structures that crack easily.
-
Layer delamination weakens prints.
-
Gaps reduce durability.
-
Understanding adhesion prevents failures.
Tip: Clean the print bed with methylated spirit to Improve Adhesion and remove contaminants before every print.
Key Takeaways
-
Clean the print bed before every print to remove dust and oils. This ensures better adhesion and reduces print failures.
-
Level the print bed properly to maintain an even distance from the nozzle. This prevents gaps and ensures a strong first layer.
-
Adjust the Z-offset to control the nozzle height. A correct height allows the filament to stick well to the bed.
Improve Adhesion With Bed Preparation
Clean The Print Surface
You must clean the print bed before every print to improve adhesion. Dust, oils, and residue reduce the grip between the first layer and the print bed. You can use several cleaning methods depending on the surface material.
-
Methylated spirit removes stubborn contaminants and enhances adhesion.
-
Isopropyl alcohol eliminates dust and oils from the print bed.
-
Warm water with dish soap cleans the print bed without leaving residue.
-
Isopropanol (minimum 90%) works well for cleaning the building platform.
You should avoid using abrasive cleaners that scratch the print bed. Clean surfaces allow the filament to bond properly and prevent warping. Regular cleaning ensures consistent build plate adhesion and reduces print failures.
Tip: Always let the print bed dry completely before starting a new print.
Choose The Right Build Surface
Selecting the correct build surface is essential to improve adhesion. Different materials require specific surfaces for optimal results. Glass, PEI, and BuildTak are popular choices for print beds. Each surface offers unique properties that affect adhesion.
|
Build Surface |
Adhesion Method |
|---|---|
|
Glass |
Glue stick |
|
PEI |
N/A |
|
BuildTak |
N/A |
Glass print beds provide a smooth finish but often need a glue stick to improve adhesion. PEI and BuildTak surfaces offer strong adhesion without additional aids. You must ensure the print bed is level and clean to prevent shifting layers and delamination, especially when printing with ABS or nylon. Heated beds and correct temperature settings also improve adhesion for challenging materials.
Apply Adhesion Aids
Adhesion aids help improve adhesion for difficult prints. You can use glue sticks, hairspray, blue tape, or specialised products like Magigoo. Many users report that glue sticks and Magigoo significantly increase their success rate. Hairspray and watered-down PVA sometimes fail to provide reliable adhesion, but glue sticks often deliver consistent results.
-
Glue stick is easy to apply and works well on glass print beds.
-
Magigoo offers strong adhesion and easy removal after printing.
-
Blue tape provides a textured surface for PLA and other filaments.
You should apply adhesion aids sparingly to avoid build-up on the print bed. Excessive adhesive can cause uneven surfaces and affect print quality. For best results, use 3d printer glue only when necessary and clean the print bed regularly.
Note: Adhesion aids are most effective when combined with proper bed levelling and temperature control.
Scuff The Bed Surface
Scuffing the print bed improves adhesion for some materials. You can use fine-grit sandpaper to lightly roughen the surface. This process increases the grip between the filament and the print bed. Scuffing works well for PEI and BuildTak surfaces, but you must avoid damaging the print bed.
-
Lightly scuff the print bed to create a textured surface.
-
Remove dust after scuffing to maintain clean conditions.
-
Avoid deep scratches that reduce print quality.
You should only scuff the print bed when you notice persistent adhesion issues. Regular maintenance and cleaning usually suffice to improve adhesion. Scuffing is a last resort for stubborn prints that fail to stick.
Callout: Consistent bed preparation is the foundation for flawless prints. Clean, level, and properly maintained print beds improve adhesion and prevent common failures.
First Layer Calibration And 3D Printer Adhesion
Level The Bed
You must level the print bed to achieve consistent first layer adhesion. An uneven print bed causes gaps or squashed lines, which lead to poor bonding and failed prints. Manual levelling involves adjusting the bed screws until the nozzle maintains an even distance from the surface at all points. Many printers offer automatic bed levelling, but you still need to check for smooth gantry movement and clean hardware.
The table below outlines common levelling errors and their impact on the first layer:
|
Error Type |
Impact on First Layer Adhesion |
|---|---|
|
Incorrect bed leveling |
Leads to poor adhesion, causing prints to detach during printing. |
|
Incorrect first-layer height |
Can lead to lifting corners and warping of the print. |
|
Dirty or worn bed surface |
Results in inadequate sticking of the first layer. |
|
Improper nozzle height |
Can cause the nozzle to be too close or too far from the bed. |
You should check the print bed before every print. Even small deviations can cause shifting layers or delamination, especially with materials like ABS. A well-levelled print bed ensures that the filament extrudes evenly and bonds securely.
Adjust Z-Offset
You must set the correct Z-offset to control the nozzle’s starting height above the print bed. If the nozzle sits too high, the filament will not stick. If it sits too low, the nozzle may drag or block extrusion. Many first layer problems come from mechanical friction or alignment drift, not just software errors. Auto-levelling systems help, but you must also ensure smooth axis motion and consistent extrusion.
To adjust the Z-offset:
-
Home the printer and move the nozzle to the centre of the print bed.
-
Use a sheet of paper to gauge the gap between the nozzle and the bed.
-
Adjust the Z-offset until you feel slight resistance when moving the paper.
You should repeat this process after changing the build surface or nozzle. Consistent Z-offset settings prevent warping and improve the quality of the first layer.
Set First Layer Speed
You should slow down the first layer speed to improve adhesion. Fast speeds can cause the filament to skip or fail to bond with the print bed. Slower speeds allow the filament to settle and grip the surface, reducing the risk of delamination.
-
Slower first layer speeds enhance filament bonding with the print bed.
-
Fast speeds often result in weak prints due to poor adhesion.
-
Recommended speeds for better adhesion range from 40 to 60 mm/s, but you should check your printer and filament guidelines.
You can adjust the first layer speed in your slicer software. Lower speeds give you more time to observe the print and make adjustments if necessary.
Tip: Start with a slow first layer speed and increase only after you achieve reliable adhesion.
Control Bed Temperature
You must set the correct print bed temperature for each filament type. For PLA, a bed temperature of 50–60°C works well. For ABS, you should increase the bed temperature to 90–110°C to prevent warping. PETG benefits from a stable bed temperature between 70–90°C. This stability helps the first layer adhere and reduces shifting or lifting during printing.
Many users find that starting PETG at 240°C for the first layer improves adhesion, then lowering to 230°C for the rest of the print yields clean results. You should always check the manufacturer’s recommendations for your filament.
Maintaining a stable print bed temperature is essential for 3d printer adhesion. Fluctuations can cause the first layer to detach or warp, compromising the final print.
Use Enclosure For ABS
You should use an enclosure when printing with ABS. ABS is sensitive to temperature changes and drafts, which can cause the first layer to lift or warp. An enclosure traps heat around the print bed, maintaining a stable environment. This stability prevents rapid cooling and improves adhesion.
-
Enclosures reduce warping and layer separation.
-
They keep dust and debris away from the print bed.
-
You can use a commercial enclosure or build one from acrylic panels.
Note: Always monitor the temperature inside the enclosure to avoid overheating electronics.
A controlled environment ensures that the first layer bonds well and the print finishes without defects.
Troubleshooting First Layer Issues
Diagnose Warping And Lifting
You may notice corners lifting or edges curling during the first few layers. These issues often signal problems with print bed adhesion. Warping and lifting can result from incorrect bed temperature, an unlevelled bed, or an unclean surface. To help you identify the root cause, refer to the table below:
|
Issue |
Cause |
|---|---|
|
Insufficient adhesion |
Not enough surface area, incorrect build plate temperature, unclean build plate |
|
Print bed not level |
Different distances between the plate and the nozzle due to levelling issues |
|
Nozzle distance incorrect |
Nozzle too close or too far from the print bed |
|
Incorrect print settings |
Wrong first layer speed or printing temperature |
You should check for these common causes when you see warping or lifting. Adjusting the build plate and reducing the bed temperature can help lower layers cool properly and improve print bed adhesion.
Fix Poor Adhesion
When your prints fail to stick, you need a systematic approach to resolve the problem. Follow these steps to restore reliable print bed adhesion:
-
Level the print bed. Manual levelling ensures the nozzle maintains a consistent gap across the surface.
-
Clean the bed surface. Use isopropyl alcohol or warm soapy water to remove dust and oils.
-
Adjust the Z-offset. Set the nozzle height so the filament compresses slightly onto the bed.
-
Check temperature settings. Use the correct nozzle and bed temperatures for your filament.
-
Apply an adhesive if needed. A thin layer of glue stick or 3D printing adhesive can enhance grip.
Tip: Different filaments and extruder temperatures affect how well the first layer sticks. Heated beds usually improve print bed adhesion, especially for materials like ABS and PETG.
If you follow these steps, you will resolve most first layer issues and achieve consistent, high-quality prints.
You achieve flawless 3D prints by levelling the bed, cleaning surfaces, and calibrating the Z-offset. Regular maintenance and environmental control ensure consistent results.
Consistent calibration and stable conditions prevent warping and maintain dimensional accuracy.
Methodical troubleshooting and attention to detail help you avoid common mistakes and produce reliable prints every time.
FAQ
What should you do if your first layer does not stick?
Clean the print bed, check the bed level, and adjust the Z-offset. Apply a glue stick or blue tape if needed.
Can you reuse adhesion aids like glue stick or tape?
You should reapply glue stick before each print. Replace blue tape when it peels or loses texture for best results.
Does room temperature affect first layer adhesion?
-
Yes, cold rooms can cause warping.
-
Use an enclosure or increase bed temperature to maintain stable conditions.
Share:
Common Reasons Your Filament Keeps Snapping During Printing
Cool and Convenient Things to 3D Print for Your Home