
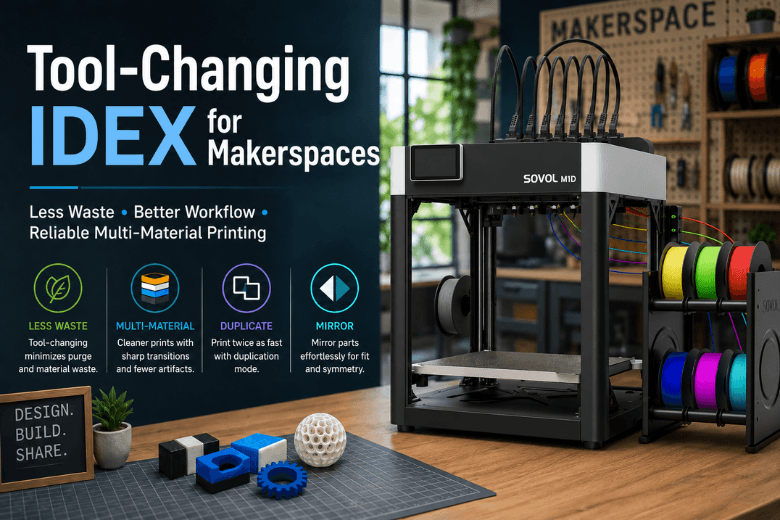
Tool-changing is having a moment in desktop FDM/FFF, and for makerspaces it’s not hard to see why: multi-material prints are useful, but purge waste, mess, and operator time add up fast in shared environments.
This post is written for UK maker community leaders who are already shortlisting machines and want a clear answer to one question:
Does a tool-changing IDEX architecture meaningfully reduce day-to-day pain in a shared space — and how do you verify that before committing?
Quick comparison: tool-changing vs filament-changing vs “classic” IDEX
|
Approach |
What changes between colours/materials |
Typical strengths |
Typical trade-offs |
Makerspace fit when… |
|---|---|---|---|---|
|
Filament-changer (single nozzle) |
Filaments swap through one shared hotend |
Simple motion system; one nozzle to maintain |
Purge/flush waste; tuning purge routines; can be messy |
You need occasional multicolour and can tolerate waste |
|
Classic IDEX (two independent toolheads) |
Two parked toolheads take turns |
Duplication/mirror modes; can do dual-material |
More calibration (offsets, levelling); more training |
You want throughput or dual-material, and have staff time |
|
Tool-changing |
Whole toolheads swap/dock |
Less shared-melt-zone purging; cleaner separation |
Docking/alignment adds complexity; more components |
You care about waste + repeatability enough to justify complexity |
Key Takeaway: The “best” system isn’t the one with the fanciest mechanism — it’s the one your team can keep calibrated and running with minimal staff intervention.
What “IDEX” actually gets you in a shared printing environment
An IDEX 3D printer (Independent Dual Extrusion) uses two independent toolheads so each can park, print, or move separately rather than being locked to the other’s position. That independence enables duplication, mirror workflows, and more predictable multi-material 3D printing when it’s properly profiled and calibrated.
-
Duplication mode: two identical parts printed at once
-
Mirror mode: left/right pairs printed in one job
If your makerspace runs repeated workshop parts, jigs, brackets, enclosures, or “everyone prints the same sample”, duplication mode can be a genuine throughput win — if your profiles are stable and your first layers are reliable.
For a clean, vendor-neutral definition of IDEX as a concept, BCN3D’s overview of IDEX Technology is a useful starting point.
For a concise plain-English definition of mirror and duplication modes, 3Dnatives includes a short explanation in its article on IDEX printers: 3Dnatives’ explanation of duplication and mirror modes.
In a private workshop, “I’ll re-tune this later” is annoying. In a makerspace, it’s a backlog.
With dual toolheads you’re typically managing more of the following:
-
XY offsets between heads
-
Z offset consistency
-
bed levelling repeatability
-
nozzle cleanliness and oozing behaviour (especially when one head is parked)
MatterHackers’ explainer on Independent Dual Extrusion (IDEX) FAQs is a good sanity check on why IDEX can reduce cross-contamination (parked heads) and why it can demand more setup discipline.
Tool-changing 3D printer vs filament-changer: where the waste (and mess) comes from
Most single-nozzle multicolour systems waste material because they have to flush a shared melt zone during every change.
A tool-changing approach tries to change the problem: if each material has its own hotend/nozzle path, you don’t have to constantly purge one nozzle clean for the next material. A high-level overview of this trade-off (waste reduction vs complexity) is discussed in Hackaday’s piece, A Tool-changing 3D Printer For The Masses (2025).
Pro Tip: For makerspaces, “waste” isn’t just filament cost. It’s also the time spent clearing purge blobs, re-running jobs, cleaning build plates, and explaining to the next member why the bin is full of plastic.
Where the Sovol M1D fits (example-led, not a spec sheet)
Sovol positions the M1D around a “DualX™ IDEX Tool-Changing System” that combines one fixed extruder for continuous printing with one tool-changing extruder for multi-material/multi-colour workflows.
From a makerspace perspective, that framing is interesting because it suggests a split between:
-
a “default” head you rely on for most day-to-day PLA/PETG work, and
-
a “specialist” tool-changing path you bring in when the project justifies it.
Claims worth treating as testable (and how to test them)
Sovol highlights features like toolhead swapping speed, camera-based calibration, and real-time Z adjustment. Those may translate into less operator time — but the only responsible way to talk about them in a decision-stage post is as things to verify.
Here’s a practical way to validate the promises without getting lost in marketing phrasing:
-
Offset stability test (XY + Z)
-
Print a two-colour registration pattern three times on different days.
-
Success looks like: the second colour consistently lands where expected without you re-tuning offsets.
-
-
Intervention rate test
-
Run a week of “normal” makerspace jobs.
-
Track: how often someone has to pause a job to clear oozing, re-load filament, or restart after a change.
-
-
Waste reality check
-
Weigh purge/prime waste for one representative multi-colour part.
-
Compare it to your current single-nozzle multicolour approach (if you have one).
-
-
Operator training test
-
Give a novice a written SOP and see if they can repeat a multi-material print without staff rescue.
-
If the tool-changing workflow reduces staff interventions, that matters more than any single headline number.
A makerspace-first evaluation checklist (what to check before you buy)
Think of this as a shortlist filter. If you can’t get “yes” on most of these, the clever hardware won’t save you.
1) Uptime and recoverability
-
Can the printer recover cleanly after a power cycle or filament runout?
-
Are common failure modes predictable and teachable?
-
Does the machine behave consistently across different operators?
If you need a reliability baseline for your wider fleet, Sovol UK’s guide on how to reduce failed prints on FDM 3D printers is a helpful reference point for the failure modes you’re trying to eliminate.
2) Calibration burden (the hidden cost)
-
How long from “something went weird” to “back to stable prints”?
-
Are calibration steps documented in a way volunteers can follow?
-
Are there checks you can do quickly at the start of each session?
3) Safety and ventilation readiness
Even if you mostly run PLA, makerspaces tend to drift into “just one ABS job” territory.
NIOSH’s guidance, Safe 3D Printing is for Everyone, Everywhere (2024), is worth reading as a reminder that good SOPs and ventilation planning are part of your printer decision — not an afterthought.
4) Support, spares, and UK logistics
For UK spaces, the question isn’t “does support exist?” It’s “can we keep this thing running when something wears out?”
Sovol UK’s overview of buying a 3D printer in the UK: delivery, warranty, and support gives a sensible checklist lens for that operational reality.
5) Speed vs quality (and why CoreXY talk can be misleading)
High-speed claims don’t matter if your real constraint is first-layer reliability, cooling, and repeatability.
If your shortlist includes CoreXY machines, Sovol UK’s explainer on why speed and stability matter on CoreXY printers is a good reminder of what actually limits “usable speed” in practice.
A simple 7-day pilot plan (designed for makerspaces)
If you can run a pilot unit, don’t waste it on calibration cubes.
Engineering.com’s guidance on how to evaluate a 3D printer / AM system aligns with what works in practice: use representative parts and compare outcomes.
Here’s a makerspace-friendly version:
-
Day 1–2: Baseline reliability
-
Print your “most common” part twice on two profiles (e.g., PLA + PETG).
-
Record staff intervention time.
-
-
Day 3–4: Multi-material stress test
-
Print one real project part that benefits from multi-material/colour.
-
Record: waste produced, clean-up time, and success rate.
-
-
Day 5: Duplication or mirror workflow
-
Print two parts in one job (duplicate or mirrored pair) and compare to running the same job twice.
-
-
Day 6: Hand-off test
-
Have a second operator repeat Day 3 with only the SOP.
-
-
Day 7: Maintenance reality
-
Inspect nozzles, wipe areas, belts, and any docking/alignment points.
-
Write the “weekly maintenance checklist” you wish came with the printer.
-
If the pilot ends with a repeatable SOP and predictable recovery behaviour, you’ve got something makerspace-ready.
Key takeaways
-
Tool-changing is most valuable when it reduces operator time and shared-space mess, not when it simply looks impressive.
-
IDEX features like duplication and mirror can be real throughput wins for workshops — but only if calibration stays stable.
-
Treat manufacturer headline claims as testable hypotheses and validate them with a one-week pilot.
-
A makerspace-friendly printer is the one you can hand to a volunteer with an SOP and still trust it to finish the job.
Next steps
If tool-changing IDEX is on your shortlist and you want to see how Sovol frames its approach (including DualX™, multi-printing, mirror/copy modes, and its calibration workflow claims), start with the official product page for the Sovol M1D.
Share:
What Is Multi Mode on the Sovol M1D?
3D printer first layer not sticking: a practical fix order that actually works