
If you’re running printers in a makerspace, school lab, or busy hobby group, first-layer adhesion isn’t a “small” issue — it’s the fastest way a print wastes everyone’s time.
The good news: most failures are fixable with a repeatable order of operations. The bad news: random setting changes (or reaching straight for glue) usually turn it into a whack-a-mole problem.
This guide is a workflow you can teach to other members so your printers behave consistently across different users.
Quick diagnosis: what a good first layer looks like
A good first layer is flat enough to bond, but not so squished that you’re starving extrusion or scraping the surface.
Print a first-layer calibration pattern (or just watch the skirt/brim) and use visual cues:
-
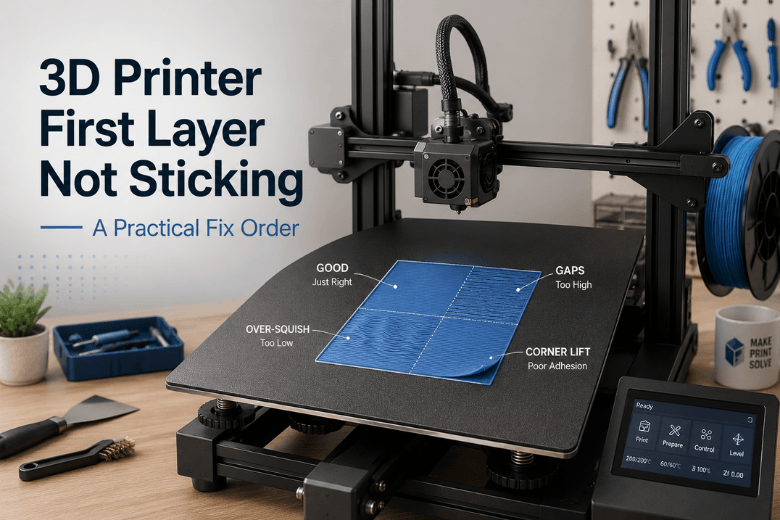
Too high (nozzle too far): lines look round, you can see gaps between lines, corners lift early.
-
Too low (nozzle too close): lines are smashed paper-thin, you see ridges between passes, the nozzle drags, edges can curl.
Prusa’s visual examples in First Layer Calibration (updated 2026) are one of the clearest references for what “too high” vs “too low” looks like.
Key Takeaway: Don’t chase adhesion by endlessly lowering Z. Prusa explicitly warns that over-squishing can damage the build surface and create new problems (see First layer issues (updated 2026)).
First layer adhesion problems: the 10-minute fix order
When someone tells you their 3D print not sticking to bed is “mysterious,” it usually means the basics haven’t been checked in a consistent order.
Run these steps in order. Each step has a “done when…” check so you can stop guessing.
Step 1: Clean the build plate (the fastest win)
Even if the plate “looks clean,” finger oils are invisible and ruthless — especially on PEI.
-
For quick maintenance, wipe with IPA.
-
If adhesion suddenly dropped (or multiple users touched the plate), wash with warm water + a small amount of dish soap, rinse, and dry fully.
Wevolver’s guide, How to Clean 3D Printer Beds: Glass, PEI, Adhesive (updated 2026), covers the “IPA vs soap-and-water” reality well.
Done when: water sheets evenly on the plate (no oily patches) and you haven’t touched the print area with bare fingers.
Pro Tip: If you’re trying to clean PEI with IPA only and it keeps getting worse, do one proper soap-and-water reset, then go back to IPA for between-print wipe-downs.
Step 2: Verify the bed is level (or re-run mesh leveling)
If one side is perfect and the other side won’t stick, it’s usually not a temperature problem — it’s geometry.
Done when: your first-layer test looks consistent across the whole build area, not just the centre.
Step 3: Set the Z offset by looking, not guessing
This is the step most people rush.
Print a one-layer square or calibration lines and adjust your Z offset in tiny moves (think small nudges, not dramatic changes). Use the visual cues in the Prusa calibration reference above.
Done when:
-
lines touch with no gaps,
-
the surface looks smooth (not ridged),
-
and the nozzle isn’t scraping.
Step 4: Tune first-layer temperatures (small changes, measured results)
Once the surface and nozzle height are right, temperature becomes meaningful.
A reliable approach is to adjust in small steps. Simplify3D recommends bed temperature changes in small increments and also calls out first-layer speed as a major lever in Not Sticking to the Bed (updated 2026).
Done when: the first layer stays flat at the corners and you can complete a full first-layer test without peeling.
Step 5: Slow the first layer down
If your first layer is skating around, it often just needs more time to “wet” the surface.
Done when: you can watch the first layer lay down smoothly without being dragged or lifted by the nozzle.
Baseline slicer settings that usually work (PLA vs PETG)
These are conservative starting points — not magic numbers. They’re designed to be easy to standardise across a community.
PLA baseline (common PEI/textured plates)
-
First layer speed: ~15–20 mm/s
-
First layer height: ~0.20–0.24 mm (with a 0.4 nozzle)
-
Line width: ~100–120%
-
Fan: off for the first 1–2 layers
-
Bed temp: roughly 50–60°C
-
Nozzle temp: roughly 205–220°C for the first layer
PETG baseline (common PEI/textured plates)
-
First layer speed: ~10–20 mm/s
-
First layer height: ~0.28–0.30 mm (with a 0.4 nozzle)
-
Fan: off or very low at the start
-
Bed temp: roughly 70–80°C (start here and adjust)
-
Nozzle temp: roughly 230–250°C (start at the low end and adjust)
One nuance worth teaching: PETG can sometimes bond too well to PEI if you over-squish or run the bed too hot — so for PETG, a slightly less aggressive “squish” can be safer than copying your PLA Z offset.
If you want a simple primer you can share with new members, Sovol’s overview, 3D Printing First Layer Problems (updated 2026), is a decent starting read.
When to use brims, rafts, or glue (and when they hide the real issue)
Adhesion helpers are tools — but they shouldn’t be your foundation.
Use them when:
-
the model has a tiny footprint
-
sharp corners are lifting
-
you’re printing warp-prone materials
-
you need extra safety margin for an overnight print
Avoid using them to cover up:
-
a dirty plate
-
a drifting nozzle height / Z offset
-
an unlevel bed
If you’re constantly relying on glue for PLA on a good plate, treat that as a signal to re-check Step 1–3.
UK workshop reality: cold rooms, drafts, and “it worked yesterday”
A lot of UK setups live in spare rooms, garages, or community spaces with doors opening all day. That matters.
Drafts and cold ambient temperatures can cool the first layers unevenly and increase edge lift/warping. Practical mitigations:
-
Keep the printer away from doors/windows and direct airflow.
-
Consider an enclosure (even a simple draft shield helps).
-
Keep the fan off on the first layers (especially for PETG and ABS-style materials).
If you’re seeing corner lift on larger parts, the Sovol UK post How to Stop 3D Prints from Warping on Large Models is a useful companion read.
FAQ
Why does my first layer stick in the middle but lift at the corners?
That’s usually a combination of uneven leveling/bed flatness, drafts, or too-low bed temperature. Clean the plate, re-check leveling/mesh, then slow the first layer and increase bed temp slightly.
Should I lower Z offset to “force” adhesion?
Only if you’re currently too high — and you should confirm it visually. Prusa warns against over-squishing as a workaround because it can damage the surface and create new failures (see the Prusa “First layer issues” reference linked earlier).
Is IPA enough to clean a PEI sheet?
It’s often fine between prints, but if adhesion degrades, a warm soap-and-water wash tends to restore grip better. (See the Wevolver build-plate cleaning guide linked earlier.)
Why did adhesion get worse after switching to PETG?
PETG behaves differently: it often likes different Z offset “squish”, higher temps, and slower first layers. Also, PETG can sometimes stick too aggressively to some surfaces, so you’re balancing adhesion with safe release.
Key takeaways
-
Fix adhesion by order: clean → level → Z offset → temps → speed, then consider brims/adhesives.
-
Set nozzle height using visual cues, not a single “magic” value.
-
Treat build-plate cleaning as a calibration step, not housekeeping.
-
Standardise a baseline first-layer profile for your community (PLA and PETG usually need different first-layer behaviour).
Next steps
If you want a more structured “community baseline” process, link these into your maker group:
Share:
How to Troubleshoot Failed 3D Prints Step by Step
Uneven First Layer: Why It Happens (and How to Fix It)